Helheim Rock Guide Updates
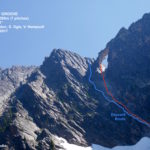
There’s a new rock climbing area on Bannock Forest Service Road in the Slocan Valley thanks in part to the efforts of valley resident Daren Tremaine with help from Jason Hartley and Albertan Marcus Norman. The area, which they’ve named “Helheim,” boasts steep lines on two, 20-metre-high boulders, which are made up of a type of gneiss that’s reminiscent of limestone. It’s a great spot for hot summer days as it’s completely shaded. Alternatively, some of the steeper routes can be done in the rain. Be warned, however, that it’s a popular spot for mosquitos in the late Spring so bring bug dope if climbing here in June. To access the area, follow the directions for Gimli Peak on page 143 of the West Kootenay Rock Guide. Once you turn onto Bannock Forest Service Road set your odometer to zero. You’ll cross a bridge, navigate through two deep water bars and when your odometer hits 1.3 kilometres look for the orange flagging tape on the poplar on the left (south) side of the road. If you have a low-clearance vehicle, park at the large pullout on the left of the road before the first water bar. (In fact, this is a good pullout for all vehicles as there’s very little room to park on the road closer to the crag.) From this spot Helheim is an easy 300-metre walk up the road. The rough access trail to the crag is about three metres downhill (east) of the flagging tape. Step off the road and down a steep bank then follow the trail for about 100 metres until it reaches the western most point of the west boulder. Follow the trail to the left (north) where you’ll find a flat area that’s great for dumping your gear and allowing young kids to play. The first climb you come across is the steep “Hela Monster.” The east boulder is just past this and harbours the majority of climbs. All routes are sport, all have anchors and a 50-metre rope is required. Members of TAWKROC and Wonow Media have only been on a few of these routes, therefore the following descriptions are mostly from Daren. Descriptions start at “Hela Monster” and then follow a clockwise direction around the boulders. (Daren’s original topo had the routes listed from East to West – see if you can figure out the word play on some of the route names.)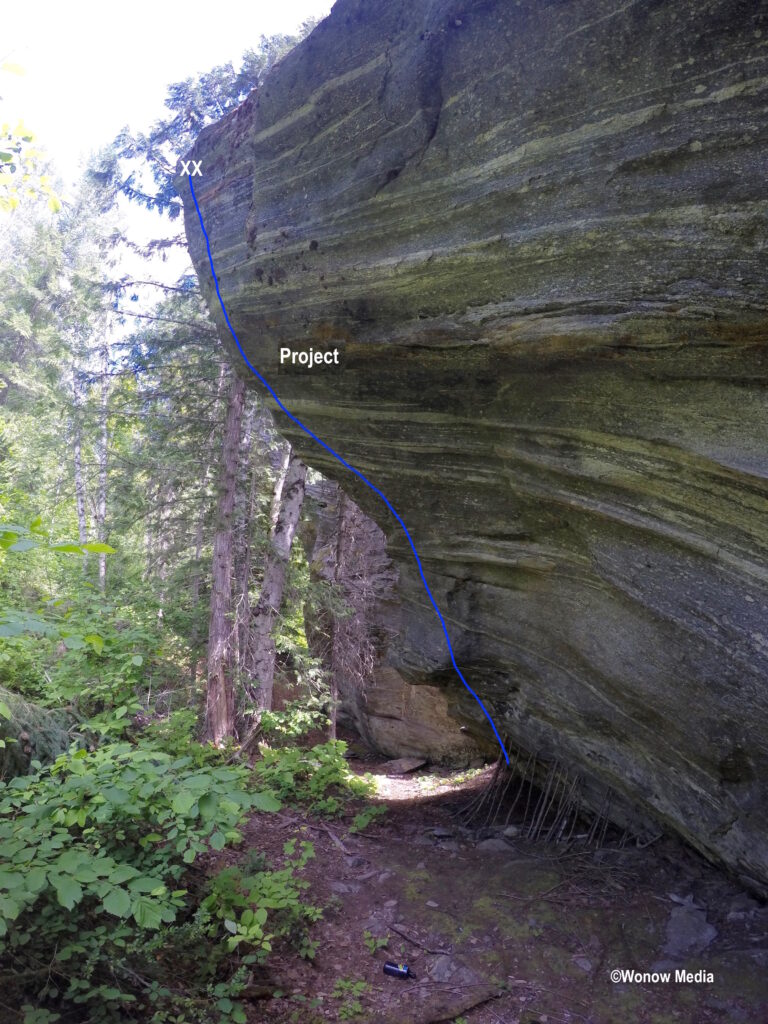
Project – The first route you come to when approaching via the trail. It goes up the super steep arête on the north-east corner of the West boulder. Marcus has requested this remain a closed project until he gets it. Not that he need worry as there aren’t a lot of 5.14 climbers in the area.
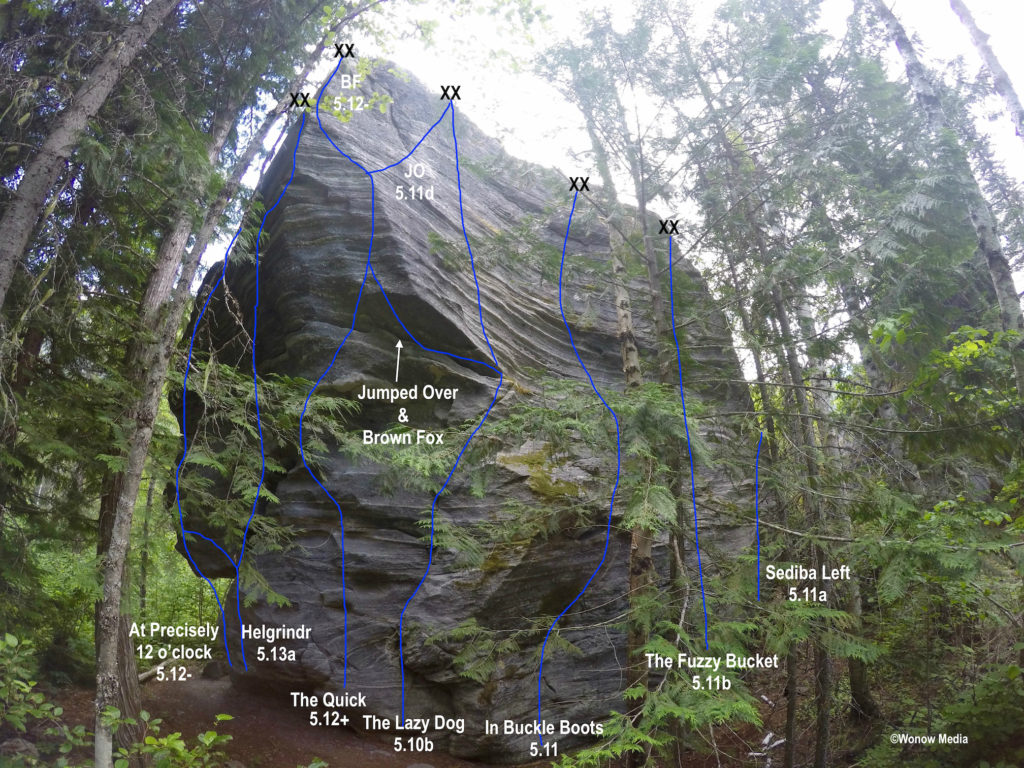
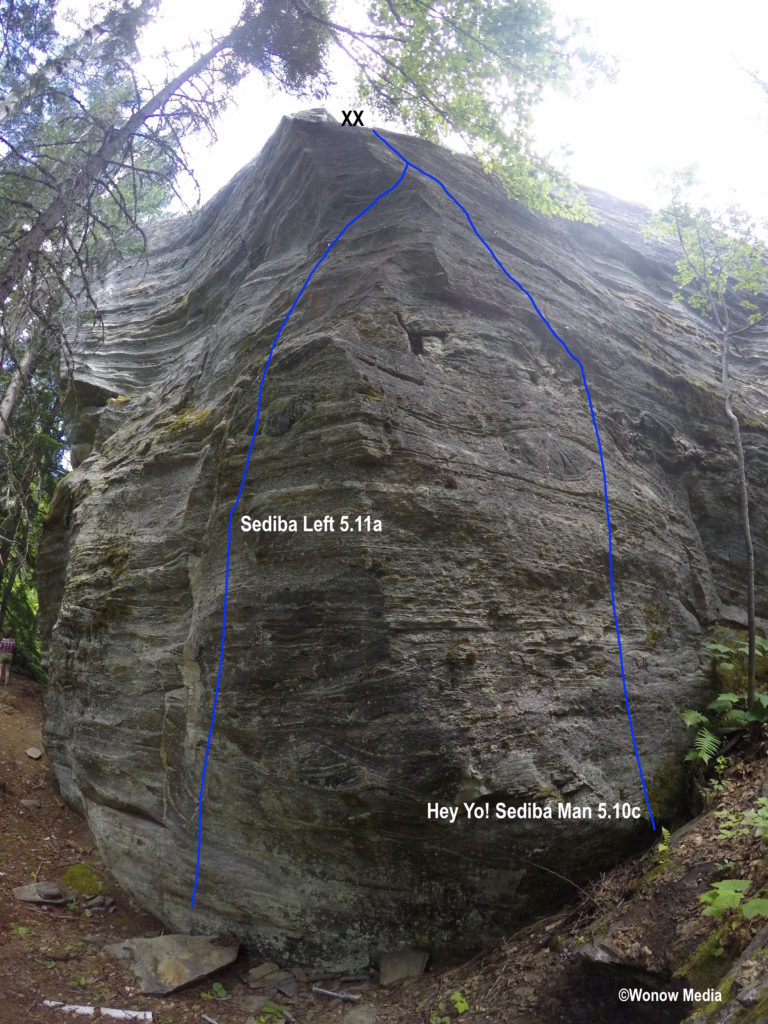
Hey Yo! Sediba Man 5.10c —This route starts on the west face of the east boulder and traverses left through a line of pockets to the arête. The upper slab ain’t a gimme. (D Tremaine 16)
Sediba Left 5.11a — A bouldery start to “Sediba Man.” Grab the quartz crimper and traverse right after the first bolt to avoid the scaly rock. A long draw on the third bolt is helpful. Continue up the arête through the tricky slab. (D Tremaine 17)
The Fuzzy Bucket 5.11b — Named for the mossy jug at the start of the route, which has since been scrubbed clean and is now a bucket with a brazilian. This route boasts a few stacked boulder problems and three people had a hand in its construction including Daren, Gary Parkstrom and Ryan Johnstone. (R Johnstone 15)
In Buckle Boots 5.11a — The line up the centre of the East Boulder’s North face. This route also had a bomber hold with moss in it but it too has been shorn. Save some jam for the crux move at the top. (J Hartley 18)
The Lazy Dog 5.10b — Follow the obvious flake that starts near the east side of the face and then finesse through the steeper wall above. (J Hartley 15)
Jumped Over 5.11d — The easiest way to get a taste of the prow. Start as for “The Lazy Dog” then step left at the roof and when things start getting too technical, head back right to the last bolt on “The Lazy Dog.” (D Tremaine 16)
Brown Fox 5.12a — Follow “Jumped Over” but stay left near the top until you’re perched on the arête at the summit of the prow. (D Tremaine 16)
The Quick 5.12+ — This route lays it on from start to finish. A series of big pulls leads to a fingery, slopey traverse and a balancey finish on the arête. The slopey edges to the right of the last bolt are in, but if you traverse all the way onto “The Lazy Dog,” then you’re a lazy dog. (D Tremaine 17)
Helgrindr 5.13a — High-quality climbing that Marcus says will soon to be an area test piece. After an easy start the action gets going with a step-up dyno. A selection of bad holds guards the finishing arête. (M Norman 17)
At Precisely 12 o’clock 5.12a — Practice your heel hooks and knee smears for this one, which is found on the eastern-most route on the face. You can start as for Helgrindr and then move right to the arête but the more aesthetic line is to start on the left below the small roof. Follow the knife-edge arête and hang on for the lip traverse. Stepping left onto the slab by the fourth bolt invites public shaming. (D Tremaine 16)

The next two routes are located on the shorter south face and are reached by walking in a clockwise direction for about 10 metres from “At Precisely 12 o’clock.” They’re located to the right of the obvious, narrow chimney.
BJL Direct V3 — You can top rope this one off the chains for “BJL” or you can boulder it although this highball problem isn’t without consequence. There’s a crux getting off the ground and another on the upper slab. Start just left of the arête on the side pull. Hit the slopey pod, then a jug. Top out on the same tricky slab that completes BJL. (D Tremaine 16)
Bill, John and Lisa 5.10c — This route boasts a surprisingly hard start which then leads to a fun traverse on great holds. Start at the bottom of the obvious chimney (the log that’s there has become a much appreciated feature, but the route does go without it) and then trend right through the wacos. Save some juice for the top slab because it ain’t over at the lip. (D Tremaine 16)
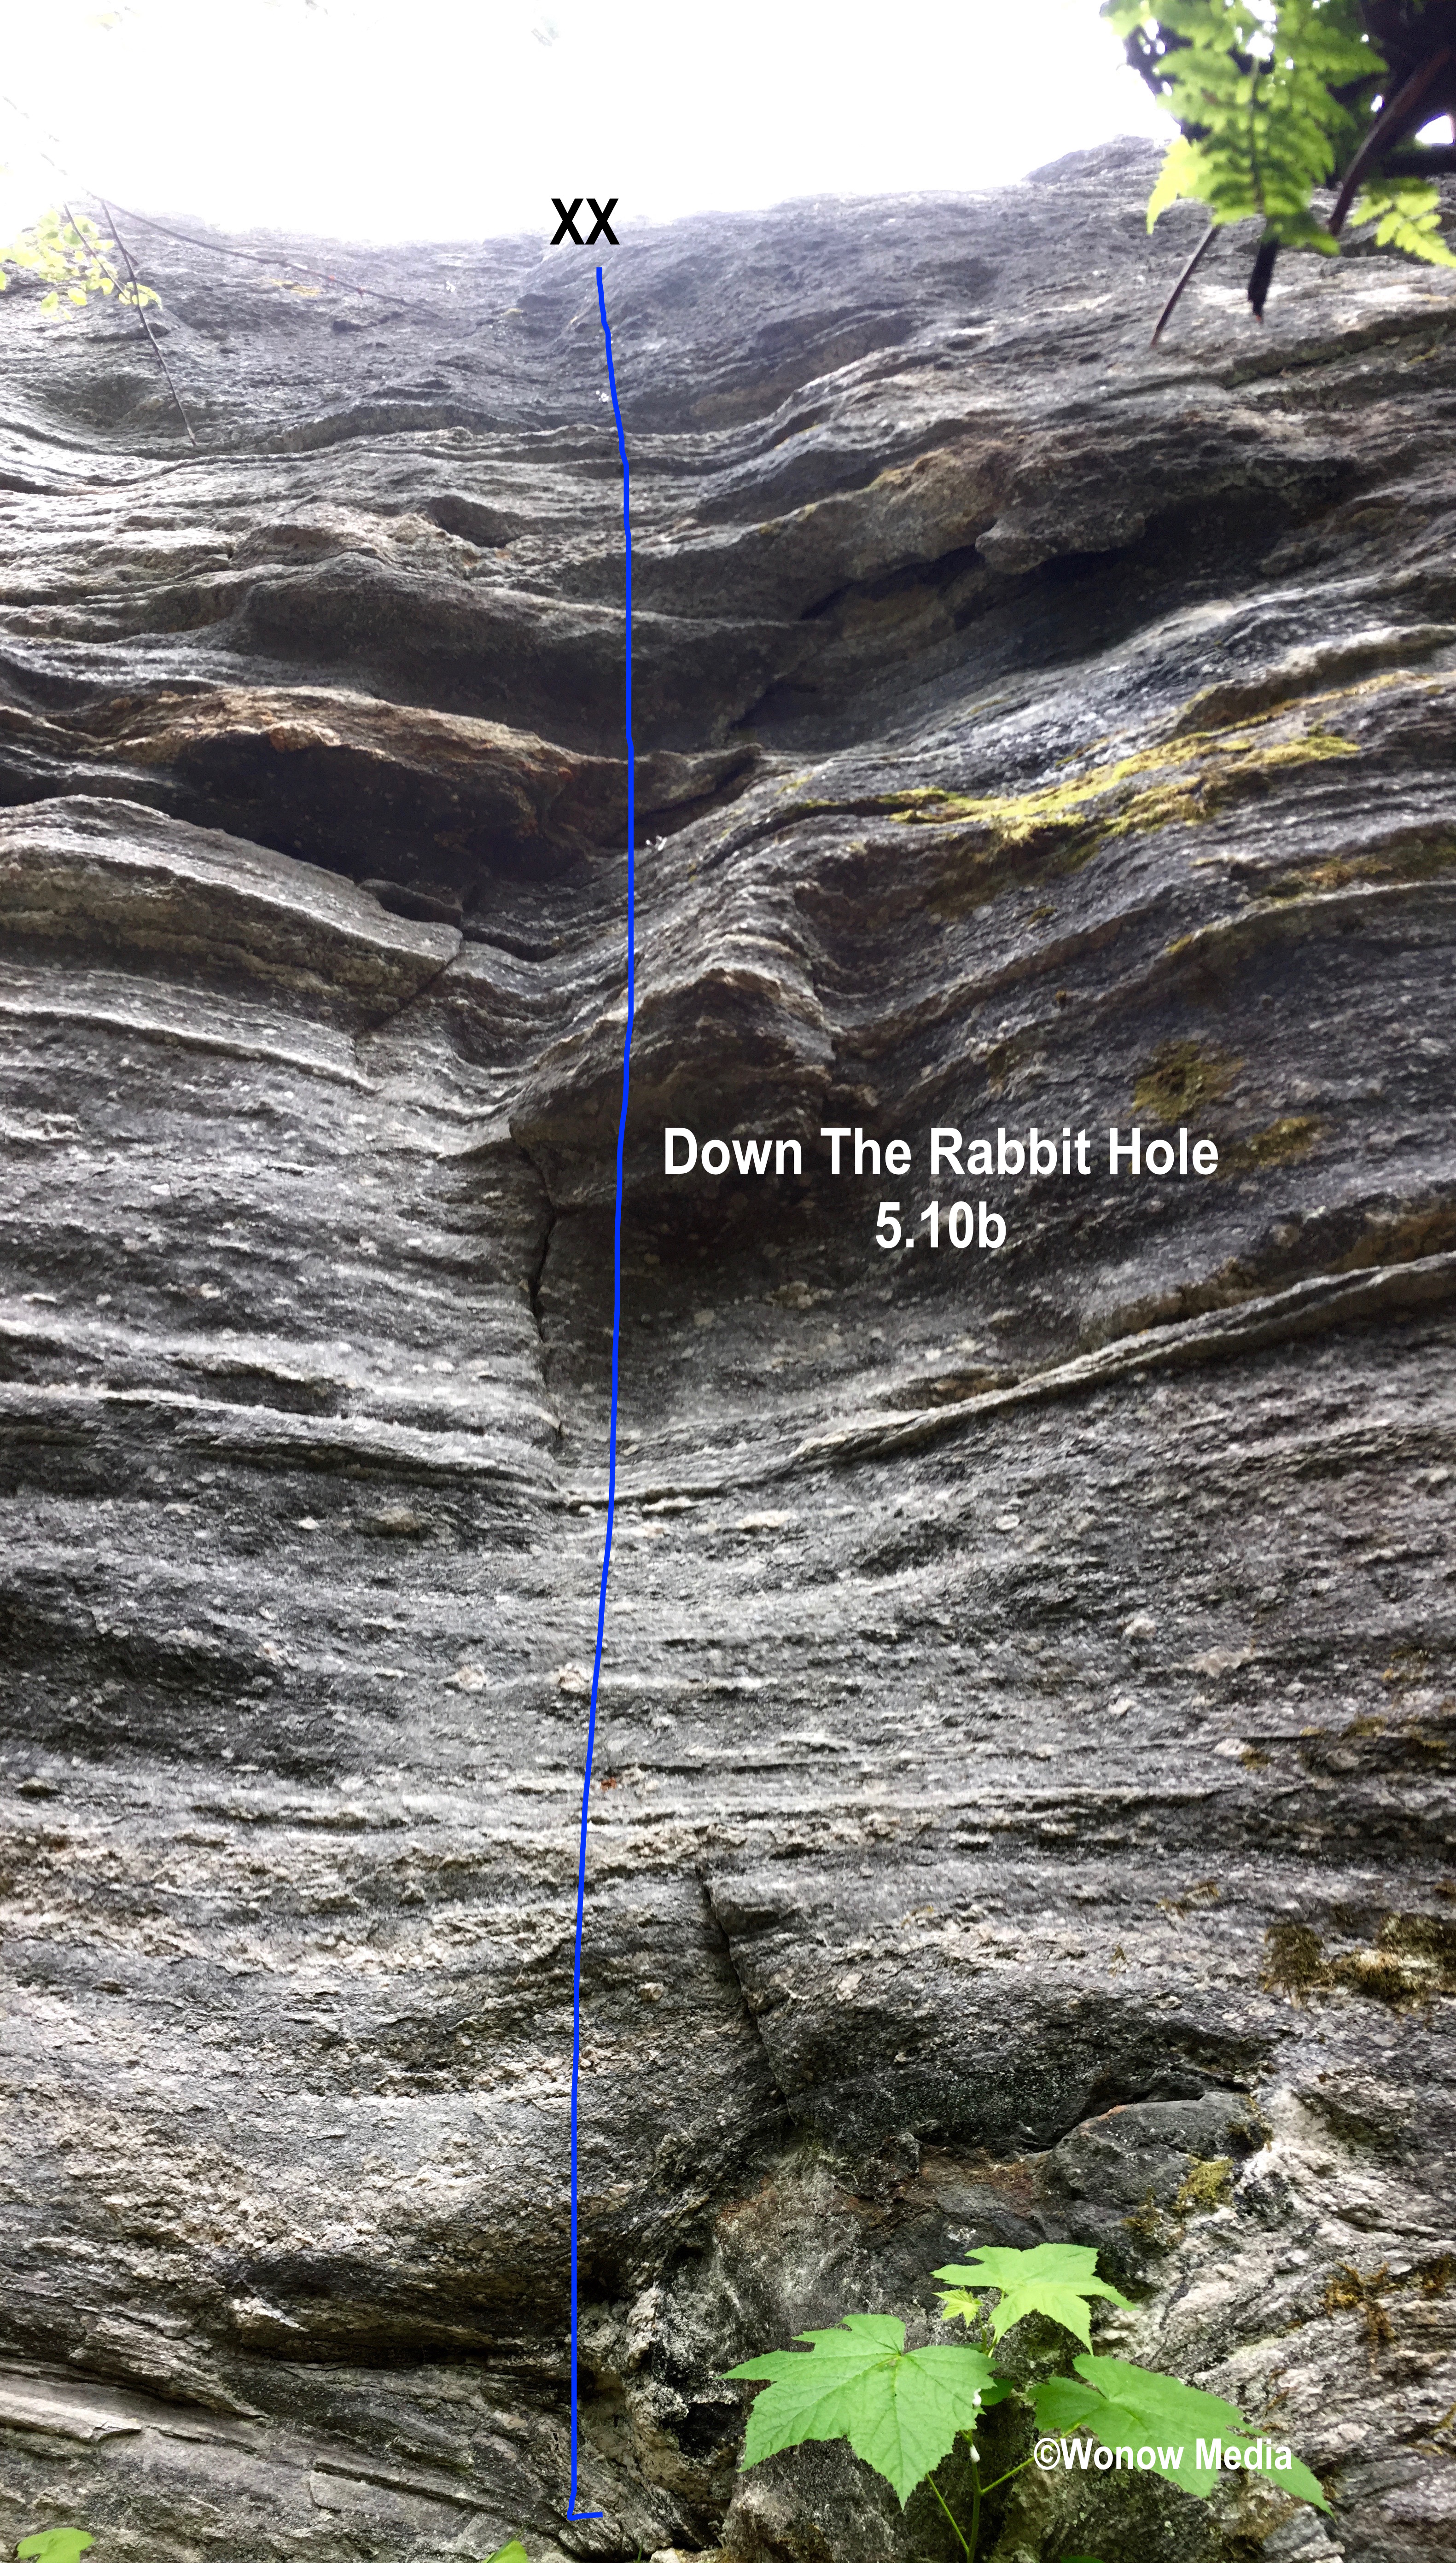
The next three routes are located on the short west face of the east boulder toward the south-west corner. The easiest way to get to them is from “BJL”: walk in a clockwise direction from the chimney until you reach the obvious two-metre-wide gully between the west and east boulders. Step into the gully and you’ll notice a line of bolts on the right (east) wall. This is “Down The Rabbit Hole” and the two routes on either side of it can either be done on top rope or as boulder problems. (Note that the landing here is not great, however.)
Black Rabbit 5.10 top rope — Top rope the line to the right of the bolts by using the directional and the anchor of “Down The Rabbit Hole.”
Down The Rabbit Hole 5.10b — Follow the line of bolts. This was meant to be an easy way to the top of the boulder that avoided the chimney grovel but it turned out to be harder than it looks.
White Rabbit 5.9 top rope — Top rope the line to the left of the bolts but using the directional and the anchor of “Down The Rabbit Hole.”
For more written descriptions and updates of other areas in the West Kootenays, download the West Kootenay Rock Guide updates.


Do you have coordinates of the Helheim Rock parking? I have been trying to find the Bannock Forest Service Road but Google doesn’t show it. This would be much appreciated!
Try this link here: https://goo.gl/maps/KWZFtVuKFp32
Perfect, thanks!
Is Hela Monster still a closed project?
Yes.