Tag Archive for: trad routes

Grand Forks Rock Climbing

Grand Forks, British Columbia, isn’t well known for its rock climbing but local Bill Sperling is changing that with his new guidebook. Just don’t call it a guidebook.

The first thing you notice when you scroll through the 24-page “Grand Forks Rock Climbing” document is the qualifier on the cover that reads “not a guidebook!” Author and local route developer Bill Sperling put it there to clarify that this is a “compilation of existing crag beta made over the years. The only guarantee is that it is full of inaccuracies.” Despite this warning, he’s done a damn good guidebook…uh…not guide. Grand Forks rock climbing has been happening since the ’70s but Bill’s effort is the first time anyone has tried to write it all down. It’s also the first time anyone’s really committed themselves to intensive route developing in the West Kootenay city: if the guide is to be believed, Bill is responsible for the majority of the routes there.

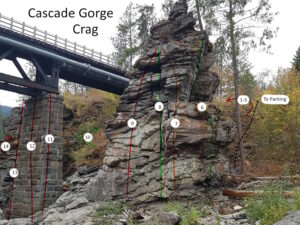
I caught up with Bill to ask about Grand Forks rock climbing, the scene, and what the routes on the old bridge pillars are like. You can find that interview at mountainculturegroup.com

Download the full Grand Forks rock climbing guidebook (which isn’t a guidebook) here: Grand-Forks-Climbing-Guide-2020.

Also, it’s awesome to hear GF is getting its own indoor gym this fall.  The Fresh Tracks Outdoors Club bouldering wall is opening on November 1, 2020.

Castlegar’s Newest Climbing Area is One Of The Best For Families

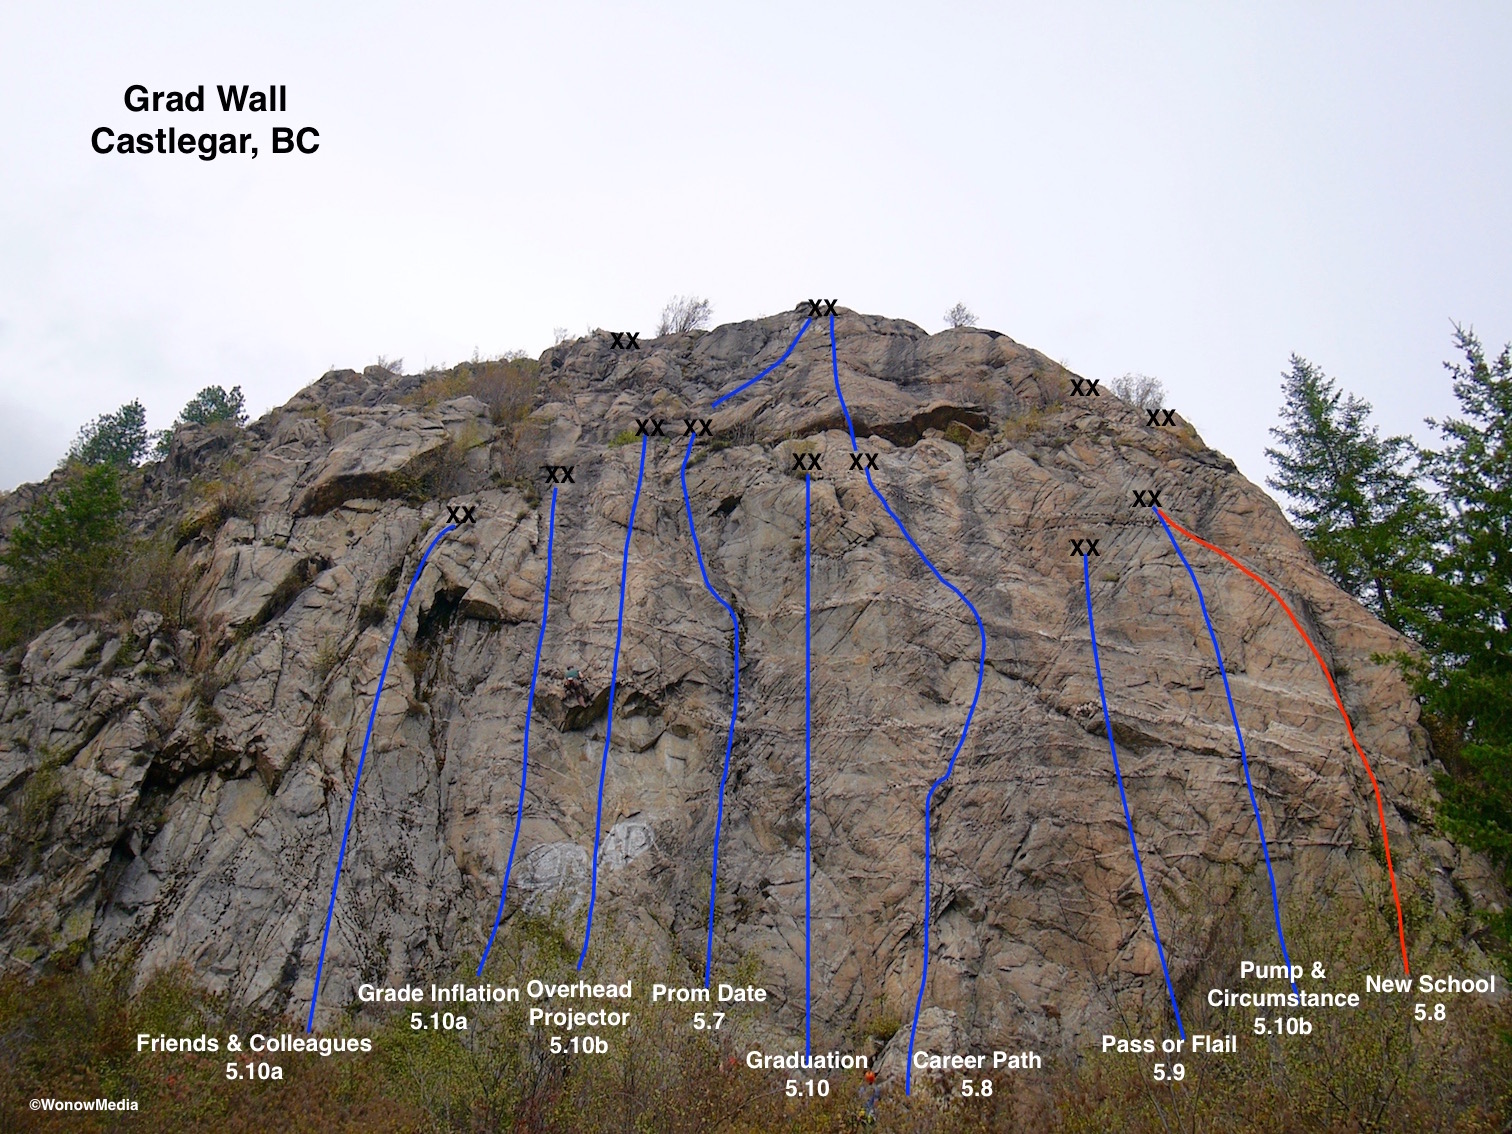
It’s hard to say what the best part about Castlegar’s latest rock climbing destination is. It could be the outstanding views of the valley that take in the mighty Columbia and Kootenay river. Or maybe it’s the fun, moderate routes that can all be ticked in an afternoon. Perhaps it’s the fact the area was developed as part of a new routing clinic offered by The Association of West Kootenay Rock Climbers and taught by David Lussier of Summit Mountain Guides during the annual Kootenay Climbing Festival. Or maybe it’s the fact the approach is relatively easy and there’s a huge meadow near the base of the wall where kids and families can hang out, enjoy the views, and play. Yes, definitely that last one. Aside from Waterline Walls and Pub Wall, the newly developed Grad Wall is one of the best in the city for families. There are nine moderate routes ranging from 5.8 mixed to 5.10b sport and it’s easy to access the top of the crag in order to set up top ropes. (There are multiple anchors from which to rappel in order to access the tops of the routes, most of which end three-quarters of the way up the cliff face.)

The following information was provided by David Lussier and the original route developers.

Access

From Castlegar, drive north on Highway 3A. After the Brilliant Bridge over the Kootenay River, turn right on the Robson Access Road. If coming from Nelson on Highway 3A south, turn right on the Robson Access Road just before the Brilliant Bridge. At 1.2kms, turn right onto Terrace Road (Verigin Tomb Road). Park about 300m up the road on a wide shoulder. From the parking area, walk a steep, faint trail up the middle of a bowl-shaped grassy slope. Once the trail levels out, continue directly towards the walls. You will cross a deep ditch and soon find yourself on a gas line. Walk west on the gas line for about 50m then follow a faint trail up the hill toward the rock walls. After about five more minutes you’ll arrive at a beautiful open grassy bench below the Grad Wall. The total approach takes about 15 minutes.

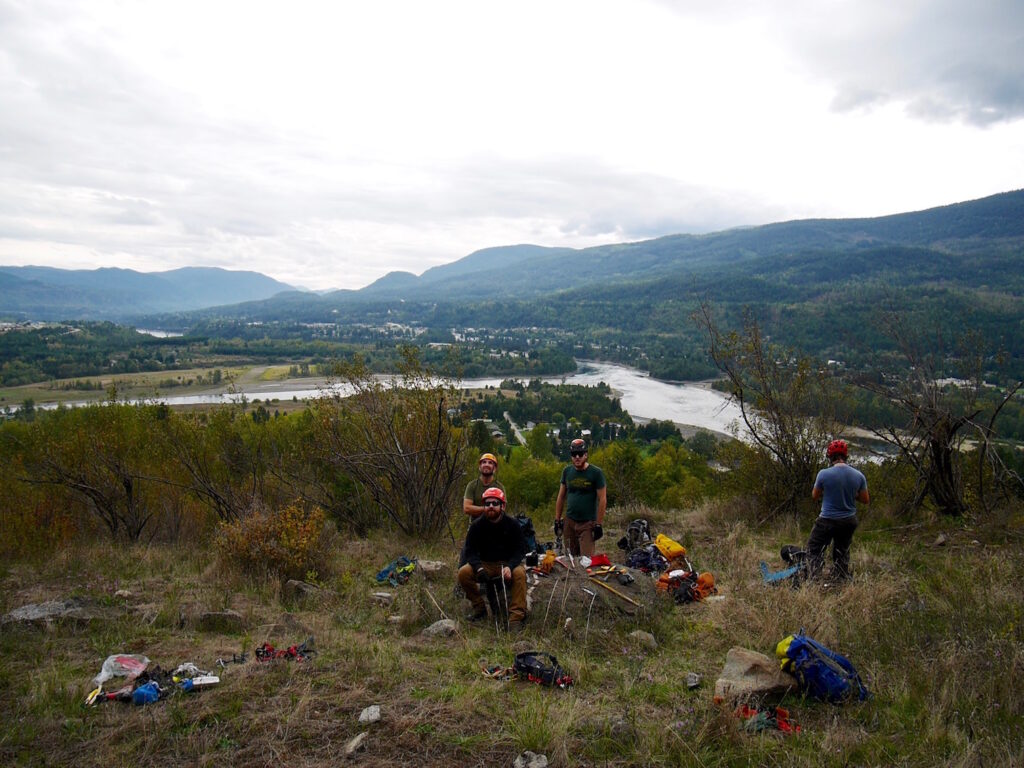
Even on a cloudy day the view from Grad Wall is excellent.

Route Descriptions

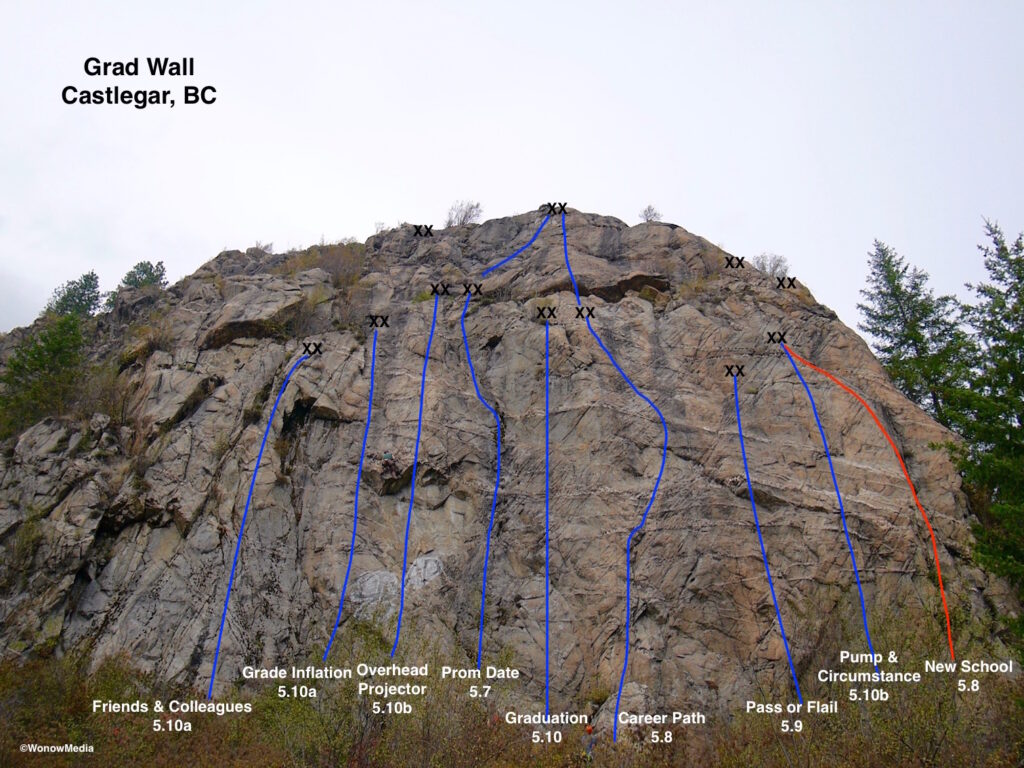
New School (5.8 mixed 23m small gear and 2 bolts). The dihedral on the far right side of the wall. Make your way up to a bolt, then layback and stem your way up a crack that protects well with small cams and nuts. Arrive at a leftwards sloping ramp, clip another bolt and head up to the anchor. FA D. Raber and K. Story

Pump & Circumstance (5.10b 25m 8 bolts). Follow the flake on the right side of the wall up to the second bolt, then move onto the face for some fun, steep climbing. Shared anchor with New School. FA D. Lussier

Pass or Flail (5.9 21m 7 bolts). Start on the right side of a solid flake. Follow the flake to the second bolt, then move left and head up for a steep crux. FA D. Lussier and D. Raber

Career Path (5.8 50m 2 pitches). A pleasant two pitch climb that starts on the large boulder in the middle of the wall.P1:(30m 9 bolts) Clip the first bolt on top of the boulder, then take an airy step onto the face. Move up the face, then traverse right under a bulge, move up through a groove, then traverse left to a slabby finish. P2:(19m 7 bolts) From the belay, climb up to the roof. One tricky but well protected move gets you over the roof. Follow a blocky ladder up to a flake. Finish at a two bolt anchor on the top corner of the wall. Descent:Two rappels or turn right from the top and enjoy a bushy walk off. FA K. Lessard, D. Lussier, D. Raber C. Stowell, and Y. Troutet

Graduation (5.10 28m 8 bolts). Start just left of Career Path.A tricky opening slab move followed by fun, steep climbing in a great plumbline. FA D. Lussier

Prom Date (5.7 50m 2 pitches). A beginner friendly lead that starts just right of the graffiti. Steep for the grade. P1:(30m 10 bolts) Enjoy fun three dimensional climbing with lots of options for hand and footholds. About 2/3rds of the way up, take an awkward step left onto a sloping ramp and traverse upwards to an anchor on a large ledge. P2:(20m 6 bolts) Trend up and right on easy climbing towards a steeper finish. Descent:Two rappels or turn right from the top and enjoy a bushy walk off. FA J. Brooks, N. Coates, D. Raber, and Y. Troutet

Overhead Projector (5.10b 30m 9 bolts). This route climbs up past the graffiti and through the middle of the obvious roof. Start on easy slab that gets harder as you approach the roof. After you pull the roof, enjoy face climbing to the ledge finish. FA D. Lussier

Grade Inflation (5.10a 25m 9 bolts). Technical face climbing brings you to an undercling, then a ledge. Enjoy a layback off the ledge and a few more moves to the mantle finish. FA D. Lussier

Friends & Colleagues (5.10a 25m 8 bolts). This route follows the pillar left of the alcove. A slab start brings you to some steep moves on the face of the pillar. Finish on jugs and some blocky moves. FA D. Raber

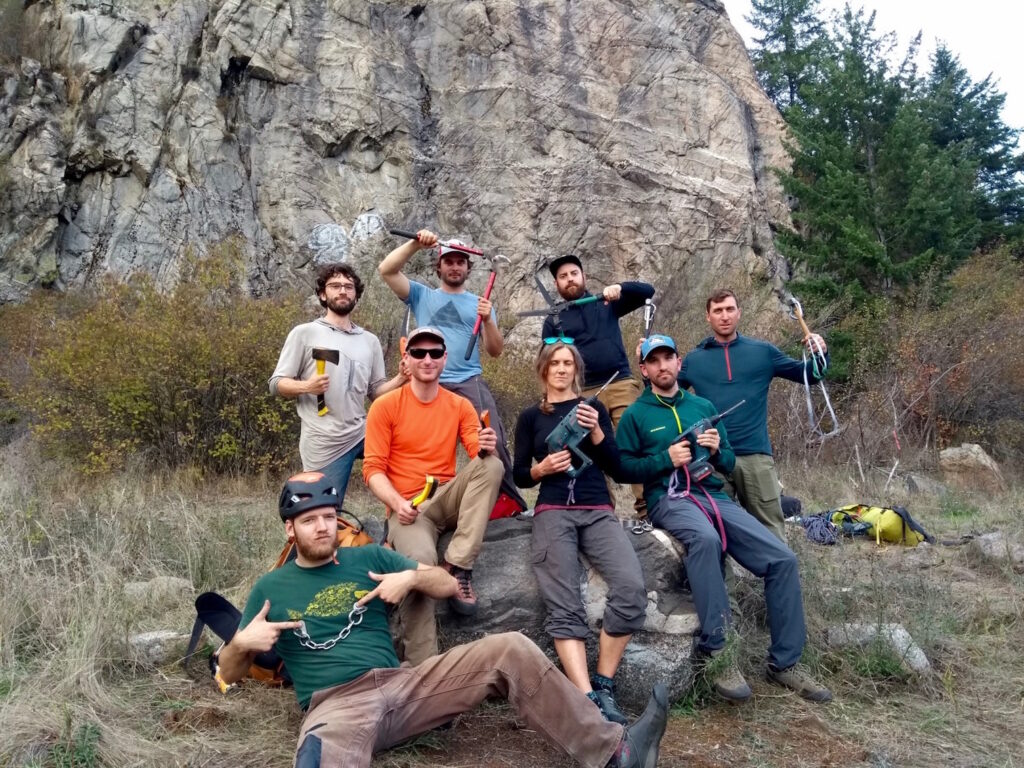
The new routing course participants about to set their tools to work on Grad Wall for the first time in September 2019. Photo by David Lussier of Summit Mountain Guides.

Rock Climbing Waterline Walls – A Retrospecive

A retrospective on the early days of development at Waterline Walls in Castlegar, British Columbia.

Ron Perrier, the author of “Where to Hike and Climb in the West Kootenay,” recently reminded me of an article I did for the Kootenay Mountaineering Club’s newsletter “Kootenay Mountaineer” in 2009. It describes the early days of development at Waterline Walls, one of the most popular rock climbing areas in the Kootenay region of British Columbia. It was fun to look back, especially considering the drama that ensued the past few years when the property that Waterline is located on went up for sale, was closed to climbing, and the eventual success of the purchase of the crag by The Association of West Kootenay Rock Climbers.

Here is the article in its entirety as it appeared in the Sept/Oct 2007 edition of the Kootenay Mountaineer.

FOR THOSE ABOUT TO ROCK

Forty Six New Routes, Two Minutes From Downtown
By Vince Hempsall

Ask long time locals, newcomers from across Canada or those who travel here from other parts of the world – Interior B.C.’s rock climbing scene, well, rocks. And it just got better. To the Slocan Bluffs, Kinnaird and Penticton’s Skaha you can add Castlegar’s Waterline Wall.

With the help of Kootenay climbing veteran Hamish Mutch, the new climbing area has been bolted and mapped, with more routes to come… t’s 7:30 in the morning and Neil Ives and I are at the new Waterline Wall climbing area watching a family of wild turkeys forage in the field next to us. I mention that it’s hard to believe we’re a mere two-minute drive from downtown Castlegar and he replies, “That’s what sets this area apart from others in the Kootenays – the access is really easy but it’s got a sort of remote feel to it.”

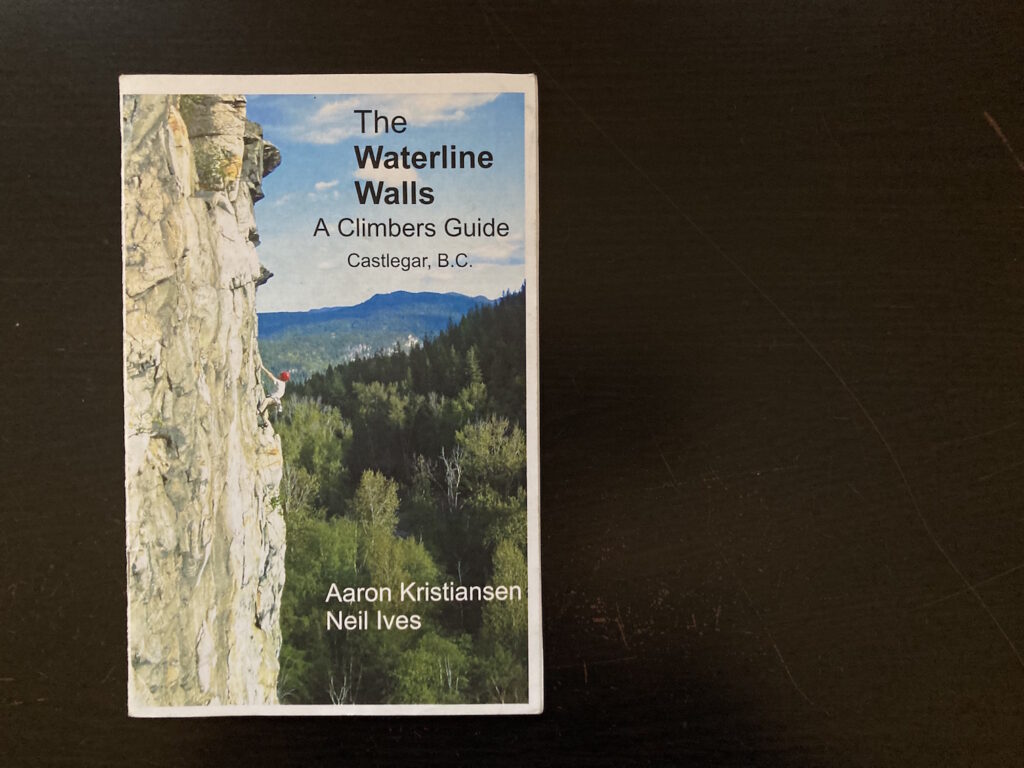
A copy of the second edition of the Waterline Walls guidebook created by Neil Ives and Aaron Kristiansen. The latter went on to create the West Kootenay Rock Guide with Vince Hempsall.

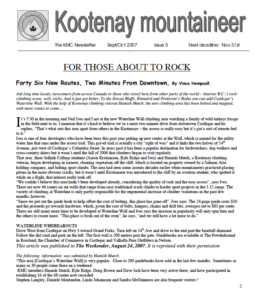
The newsletter this story originally appeared in.

Ives is one of four developers who have been busy this past year putting up new routes at the Wall, which is named for the utility water line that runs under the access trail. This gravel trail is actually a city “right of way” and it links the two halves of 14th Avenue, just west of Castlegar’s Columbia Street. In years past it has been a popular destination for birdwatchers, dog walkers and cross-country skiers but it wasn’t until the fall of 2006 that climbers began to visit regularly. That year, three Selkirk College students (Aaron Kristiansen, Kyle Ridge and Ives) and Hamish Mutch, a Kootenay climbing veteran, began developing in earnest, cleaning vegetation off the cliff, which is located on property owned by a Salmon Arm holding company, and bolting sport climbs. The area had seen some ascents decades earlier when mountaineers practiced placing pitons in the more obvious cracks, but it wasn’t until Kristiansen was introduced to the cliff by an aviation student, who spotted it while on a flight, that interest really took off. “We couldn’t believe this area hadn’t been developed already, considering the quality of rock and the easy access”, says Ives.

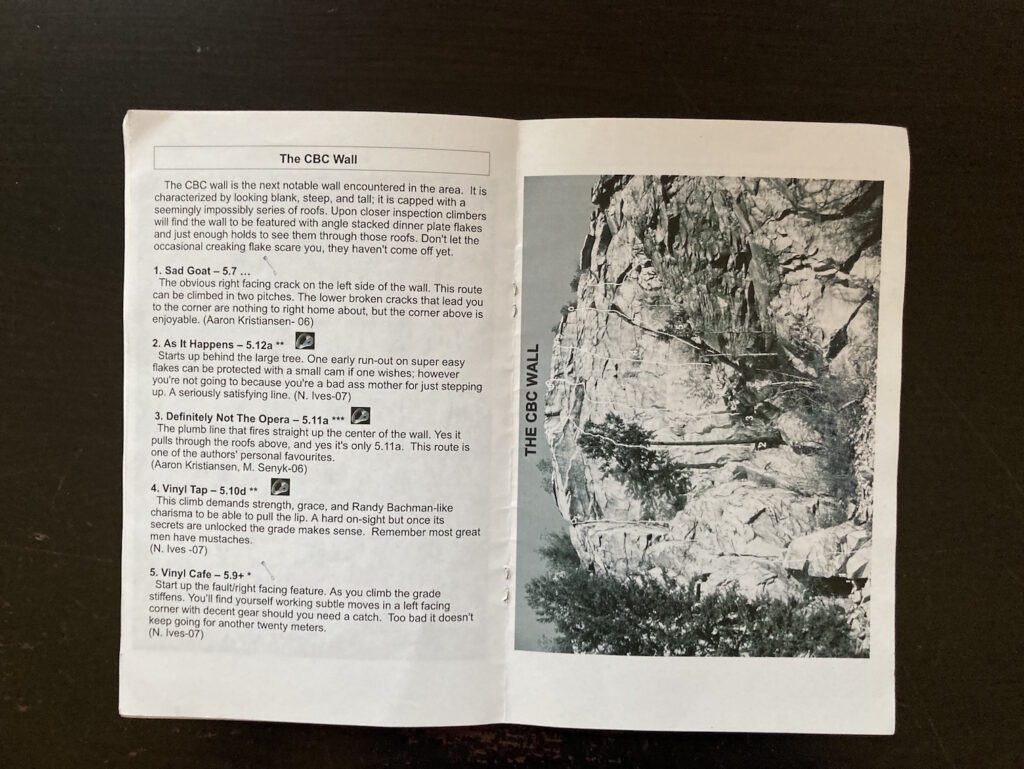
There are now 46 routes on six walls that range from easy traditional crack climbs to harder sport projects in the 5.12 range. The variety of climbing at Waterline is only partly responsible for the exponential increase of climber visitations in the past few months, however. “Since we put out the guide book to help offset the cost of bolting, this place has gone off”, Ives says. The 24-page guide costs $10 and the proceeds go towards hardware, which, given the cost of bolts, hangers, chains and drill bits, averages out to $85 per route. There are still many more lines to be developed at Waterline Wall and Ives says the increase in popularity will only spur him and the others to create more. “This place is fresh out of the oven”, he says, “and we still have a lot more to do.”

WATERLINE WHEREABOUTS Drive West from Castlegar on Hwy 3 toward Grand Forks. Turn left on 14th Ave and drive to the end past the baseball diamond. Follow the dirt road and park on the left. The first wall is 200 metres past the gate. Guidebooks are available at The Powderhound in Rossland, the Chamber of Commerce in Castlegar and Valhalla Pure Outfitters in Nelson.

New 5.10a Route in the Valhallas is a Monster

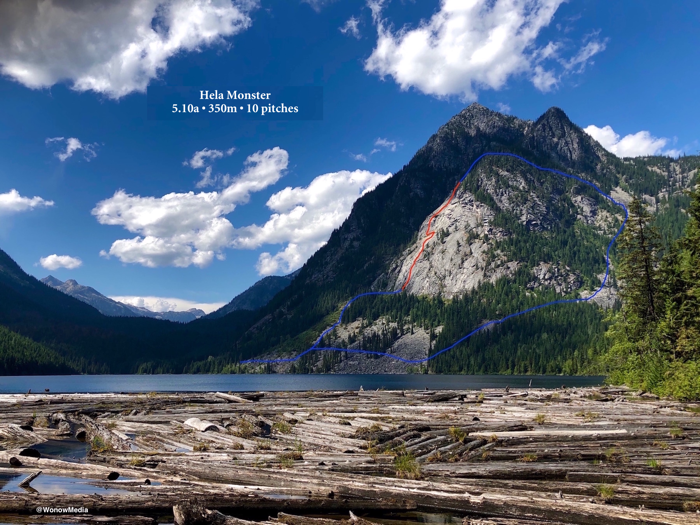
This summer professional photographer Steve Ogle and I climbed a new route up a beautiful swath of virgin slab in Valhalla Provincial Park near Cahill Lake. These are the details.

There’s a giant south-facing slab that can easily be seen from Highway 6 north of the village of Slocan before the S-bend that takes you over Enterprise Creek. It’s impossible to judge from that distance just how large it is but after a recent adventure Steve Ogle and I can now confidently attest to the fact that it’s really, really big. And in 30+ heat, it’s really, really hot.

In August we paddled from Slocan to Evans Creek and then hiked the three hours up the relatively mellow Beatrice Lake Trail. (The only real steep part of the hike is at the beginning as you rise out of the mouth of Evans Creek.) We passed the aptly named Emerald Lake, encountering another short steep hiking section up from its west end, to Cahill Lake in Valhalla Provincial Park. Our objective was the face of a large dome of gneiss on the north shore of the lake that’s backed by the sub-peaks of Hela Peak. It’s a stunning piece of white rock that’s easy to access from the campground at the west end of Cahill Lake. The same day we hiked in we did a recon mission to the base of the wall, scoped a line, stashed some gear, and went back to camp to rest before the next day’s push.
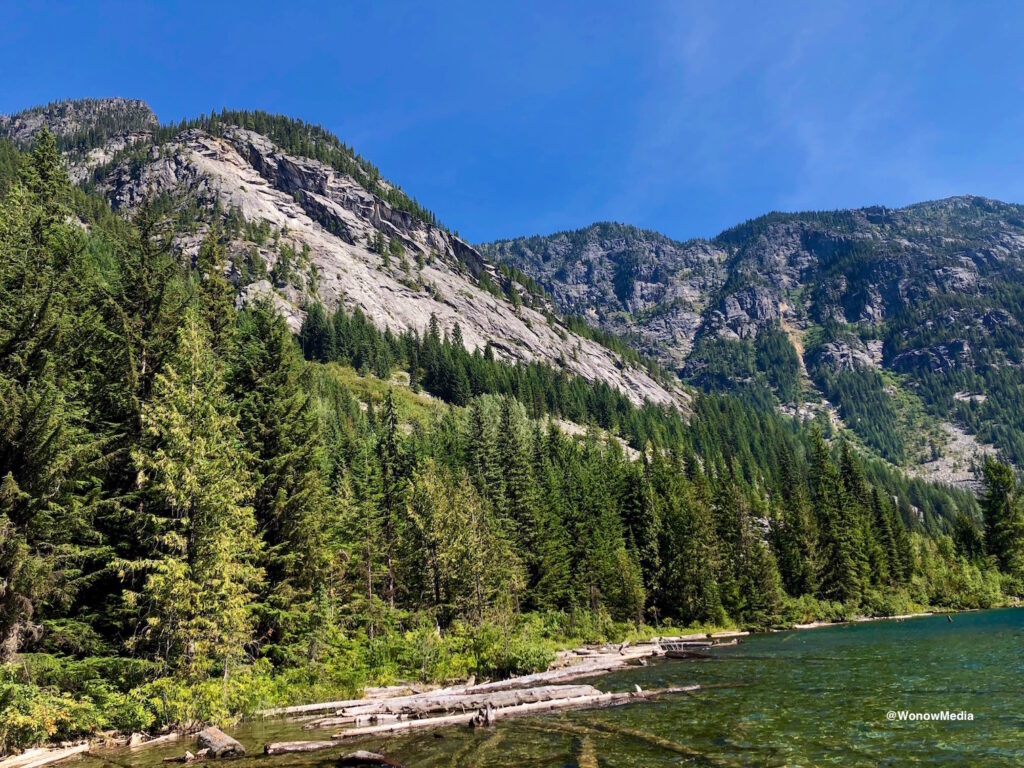
Hela Monster as seen from the Cahill Lake campground.

The next day proved to be a bit longer and hotter than expected. In hindsight, Steve dumping a half litre of water at the start of the route because it was too heavy wasn’t the best idea. Nor was leaving one headlamp at camp. By the time we reached pitch 5, bolting the occasional blank section on lead, the temperature had climbed above 30°C. Luckily there were intermittent clouds but it wasn’t long before I was sucking on the lid of my chapstick trying to trick my brain into believing there was moisture in my mouth. Another five pitches took us near top just as the sun was starting to set. We ate wild blueberries on the fly, savouring the minuscule amounts of moisture they provided, and then stumbled down talus for 1.5 hours using one headlamp and the light from a cellphone, before reaching an unnamed creek where I consumed about three litres of water in 10 minutes. We walked back into camp 15 hours after setting out, toasted the new 10-pitch route with scotch, and collapsed.

Despite our challenges, I highly recommend this climb for those who want an adventure in a beautiful setting up easy slab. There’s only one 5.10a move on the whole route and it’s protected by a bolt. The rest of this monster climb is mostly in the 5.5 to 5.7 range, although you’ll want to be comfortable running out easier sections of slab as gear can be sporadic in places. Oh, and pick a day that’s not super hot.
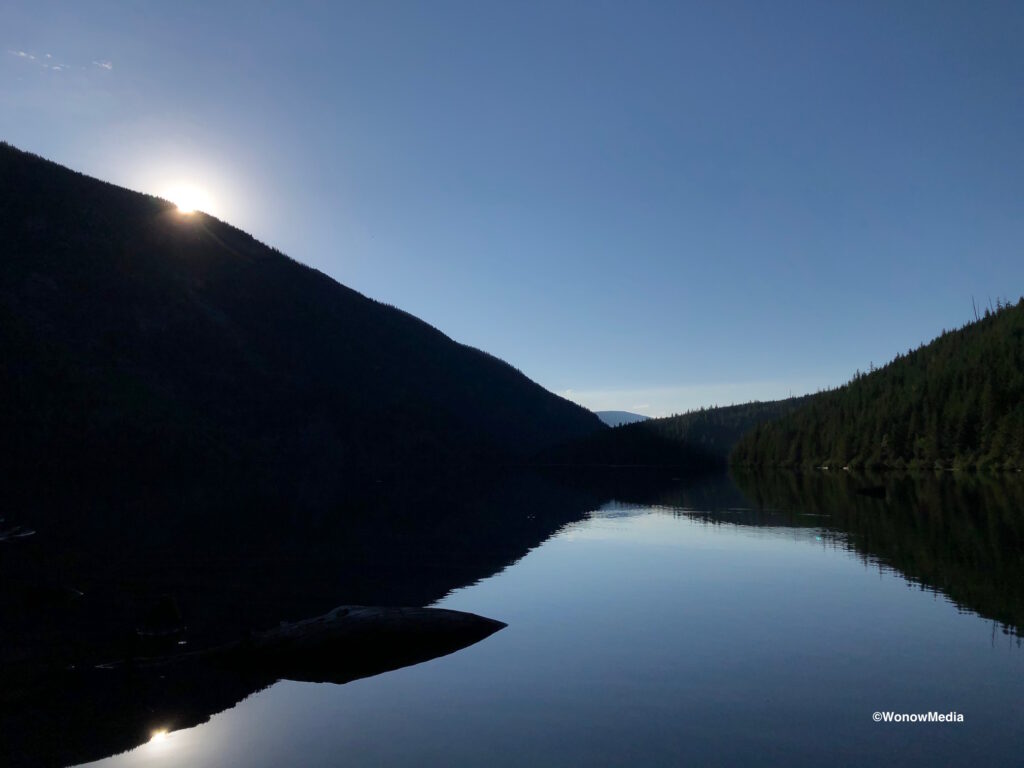
Cahill Lake photographed the morning after the first ascent of Hela Monster.

Hela Monster Route Description

Hela Monster • 5.10a • 350 metres • 10 pitches • South-facing • FA: Steve Ogle, Vince Hempsall August 2020

About The Route Name

Hela is a prominent peak in Valhalla Provincial Park named for the Norse goddess Hela (aka Hel) who is the daughter of Loki and giantess Angrboda and who presides over the realm of the dead. Her appearance is described as half blue and half flesh-coloured, which is appropriate given the views from the route, which include the stunning blue lake and the pasty Slavic-white skin colour of the rock. A Gia Monster (pronounced “Hila Monster”) is one of only two poisonous lizard species in North America, which is also appropriate given this route has bite when you’re climbing it in 30+ heat, like we did.
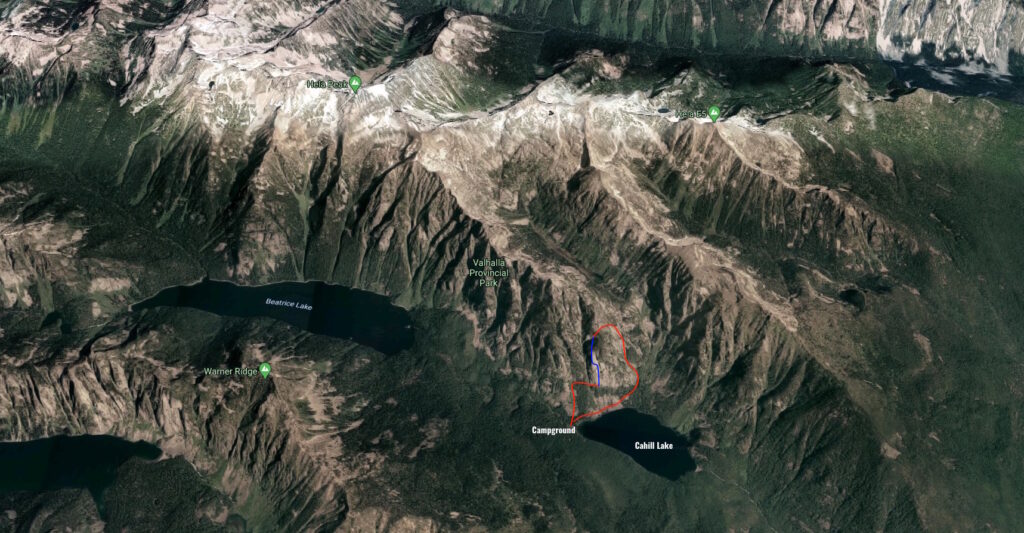
A Google Map topo of the route in blue and the approach and walk-off in red.

About The Climb

Hela Monster is located on a huge slab of granitic gneiss that is solid, textured and clean, except for where dirt has gathered in the cracks. The climbing is mostly in the 5.5 to 5.7 range. Route finding is very easy thanks to all the bolts but protection is sparse on some of the easier terrain. All crux moves are protected. Most stations are bolted but those that do not have either trees or boulders that can easily be slung.

History Of The Area

Slocan Lake and Evans Creek were important fishing grounds for multiple First Nations throughout the centuries as evidenced by the pictographs on the lake’s west shoreline between Slocan Village and Evans. In the 20th Century this area became a hotbed of mining and logging – in fact, the tiered lake systems from Beatrice to the Slocan were flooded and then released so as to move timber down the drainage. The Beatrice Lake hiking trail is an old logging road and there’s still a lot of evidence of the old camps, from rusted cans to rotting machinery. Today the popular hiking trail leads you into Valhalla Provincial Park, which was established in 1983.
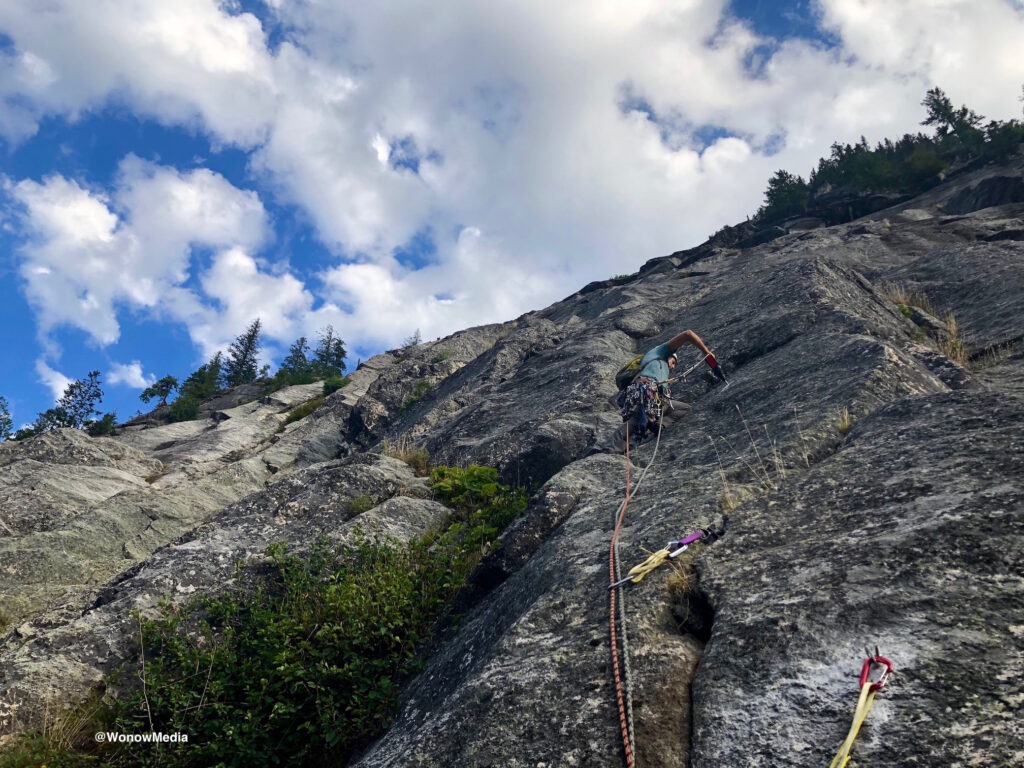
Steve Ogle enjoying bolting on lead for the first time while on the first pitch of Hela Monster. Huge props to Jeff Hammerich for the loan of the drill.

The Approach

From the village of Slocan, boat or hike the 8km trail to Evans Creek Campground. From here, hike the Beatrice Lake Trail 8.5km (800m of elevation gain) past Emerald Lake to Cahill Lake where you’ll find a campground at the west end with six tent pads, an outhouse, and a metal food box. You can see the route from here as it follows the prominent white streak that runs down the slab from the top corner system which is stained brown. The route starts just to the looker’s right of the white streak, next to the lone tree at the bottom of the face. The tree has branches on only one side. From the campsite walk north over the small tributary (it’s easy to cross via logs or boulders) and then veer northeast towards the scree slope. Walk the scree, diagonally up and east until you reach the first line of conifers. To avoid excessive bush-bashing, walk up the scree slope from here until you reach the base of the wall. Follow it east until it slopes back down and you’ll see the tree at the start of the route. Scramble up the grassy gully and then up to the ledge the tree resides on. You’ll see two bolts on the wall directly above you.
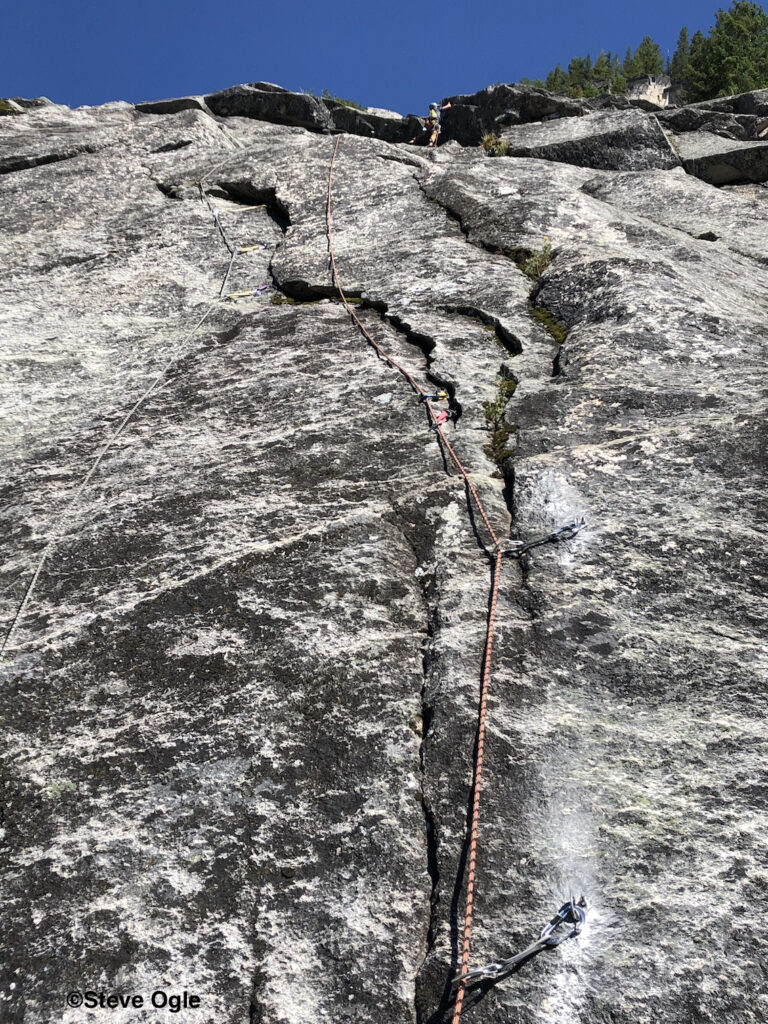
Vince on the crux move of the second pitch of Hela Monster.

The Gear

Take a standard rack to 2” plus doubles of .75 and 1.0 and a rack of nuts. Both climbers should have a nut tool to dig dirt out of cracks for protection if required. Also take 14 draws including 6 extendable ones. One 60-metre rope is all you need if you’re planning to walk off. Take two 60-metre ropes if you want to rap. Be aware rapping is not recommended, however. See descent description below for more info.
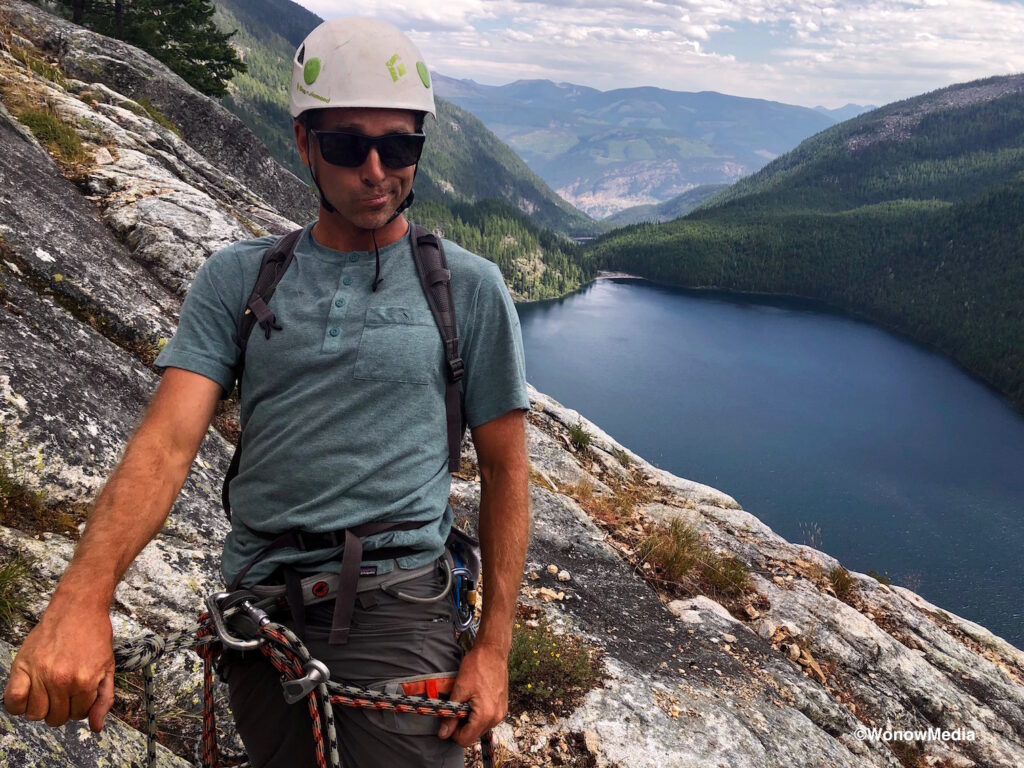
Steve questioning the decision to dump water at the start of the route to save weight as the day’s temperature rises past 30°C.

Pitch Descriptions

Start Location: 49°52’01.5” N 117.33’06.7” W

P1 (58m 5.7): Start at the tree and pass the two bolts. Trend left using sporadic gear and pass three more bolts to finish at a bolted station on a small ledge just below a larger grassy ledge at 58m. There’s one 5.7 move off the deck but otherwise this pitch is in the 5.6 range. 5 bolts

P2 (58m 5.10a): Climb past two bolts then follow the flake, laybacking and jamming through 5.8 terrain until you can step over to easier ground. Continue up, aiming for the V-shaped notch that is past a big left-facing dihedral. Pull a mantle move over the roof, which is protected by a bolt that can only be seen once you’re at the roof. This is the only 5.10a move on the route and can easily be aided. Continue another 10 metres past an additional bolt to a station. 4 bolts

P3 (45m 5.6): Move up a wide corner and then either step left to the arete or continue up the corner. Past this feature is an easy section of slab climbing where protection can be found by the large block to the right if needed. Gain the large ledge and find a two-bolt anchor to the left of a bushy gully.

P4 (58m 5.6): Go directly up a seam and two overlaps, continuing slightly left above to gain more cracks with sparse but adequate protection. Finish on the twin cracks to the right of a whale-like feature and belay by slinging the lone ottoman-sized white boulder.

P5 (30m 5.2): Scramble up low fifth-class terrain to gain a huge ledge that slopes downward slightly to the left. The bolt anchors are about 20m left from where the scramble meets the ledge.
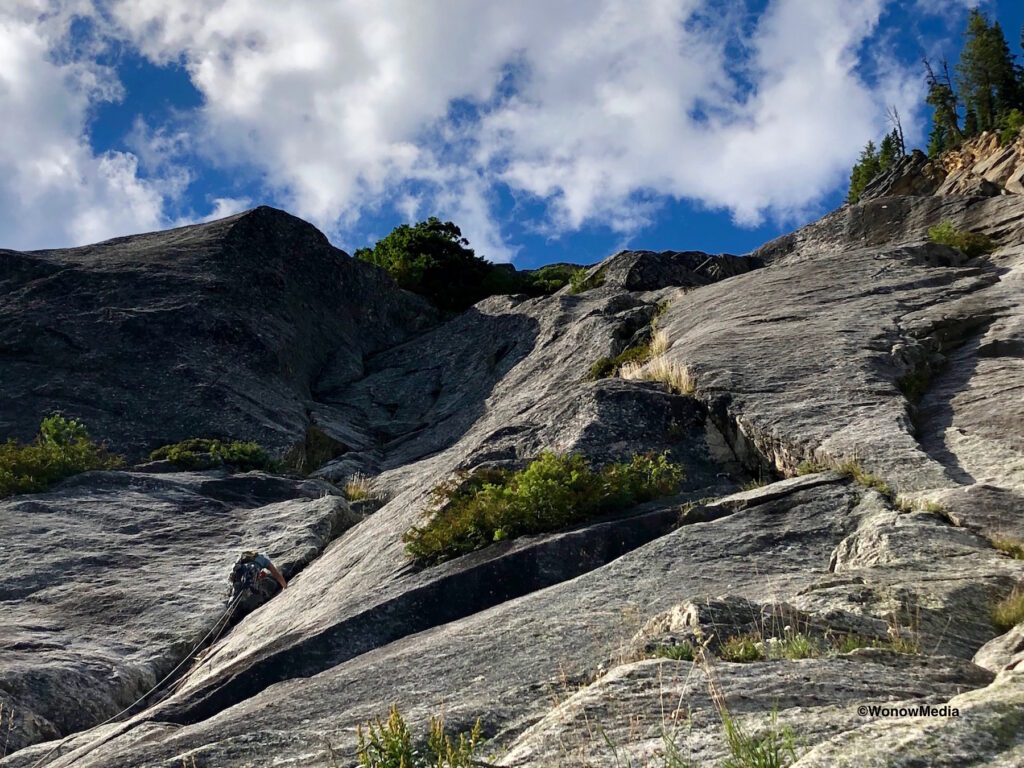
Steve leading the excellent 6th pitch of Hela Monster.

P6 (60m 5.8): From the anchor angle up and left over fourth class terrain (no protection) to gain a broad V-shaped crack system that trends up and left into a right-facing dihedral. Belay from the ledge at a two-bolt anchor at the top of the dihedral.

P7 (60m 5.5): Continue up straight, skirting below and to the right of a large bunch of bushes and trees. Then angle slightly right and up through easy terrain. Aim for an area approximately 10 metres to the left side of a large sloping roof. Belay at a very small tree with a good-sized root ball with a fixed sling.

P8 (58m 5.8): Climb easy terrain and then left onto mellow slabs. There is a bolt in a more blank section of rock at around the 40m mark. Continue left past the bolt and follow a small seam with one small gear placement. Finish up on a ledge with darker rock where there’s a two-bolt anchor. 1 bolt

P9 (60m 5.2): Move up and left over easy ground then walk on the moss-scattered ramp skirting below the treed cliffs as far as you can reach to a fir tree. Sling this and belay.

P10 (60m 4th class): Continue walking uphill and to the right across pine needles, over blocks and around trees until you reach easier ground at the 60m mark. Belay from whatever you can sling. From here it’s an easy walk to the height of land but be careful not to veer too far right towards the cliffs.
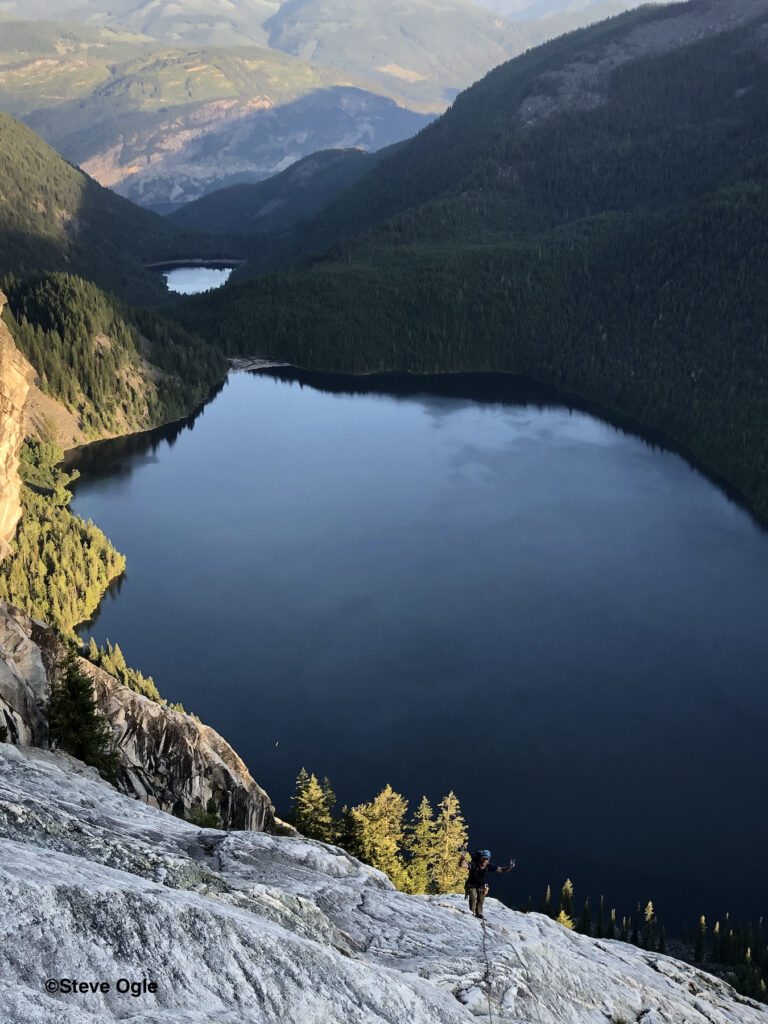
Vince enjoying the relatively mellow terrain of Pitch 8 above Cahill Lake.

The DESCENT

It took the first ascentionists two hours to walk back to the campsite and some of that time was spent in the dark. From the top of pitch 10, continue hiking east up mellow terrain to where the ground flattens out. Once there, walk in a north-east direction past wild blueberry bushes and conifers. Although you’ll be trending slightly downhill, it’s important to stay relatively high as most of the south-east slope cliffs out. Eventually you’ll reach a scree slope that you can follow down, first east and then it swings around south and a creek is on your left. Keep walking towards the lake and when the scree ends, trend southwest through the trees (this is the only heavy bushwhacking you’ll have to endure) to gain the scree slope below the south face of the slope you’ve just climbed. Stay approximately 80 metres above the lake edge for easier walking. Rappelling the route is not recommended because it’s so low angle and the chances of getting your rope stuck are high. However, if you get stuck and need to rappel, remember that all pitches require two 60m ropes. You’ll have to sling trees at the top of P10, P9 and P7 and make an awkward diagonal west-to-east rappel from the anchors at the bottom of P5 to the ottoman-sized boulder at the top of P4. From there rappelling to the base of the route becomes easier.

Here’s a downloadable PDF of the route information for Hela Monster: hela monster full description

A few weeks after the first ascent, Greg Amos and two others climbed the route and provided some feedback on the pitch descriptions. Big thanks to them. Also, they recorded their route and have a KMZ file available. Comment below if you’d like a copy of it.
New 5.7 Route On Natural Rock Arch In Purcells

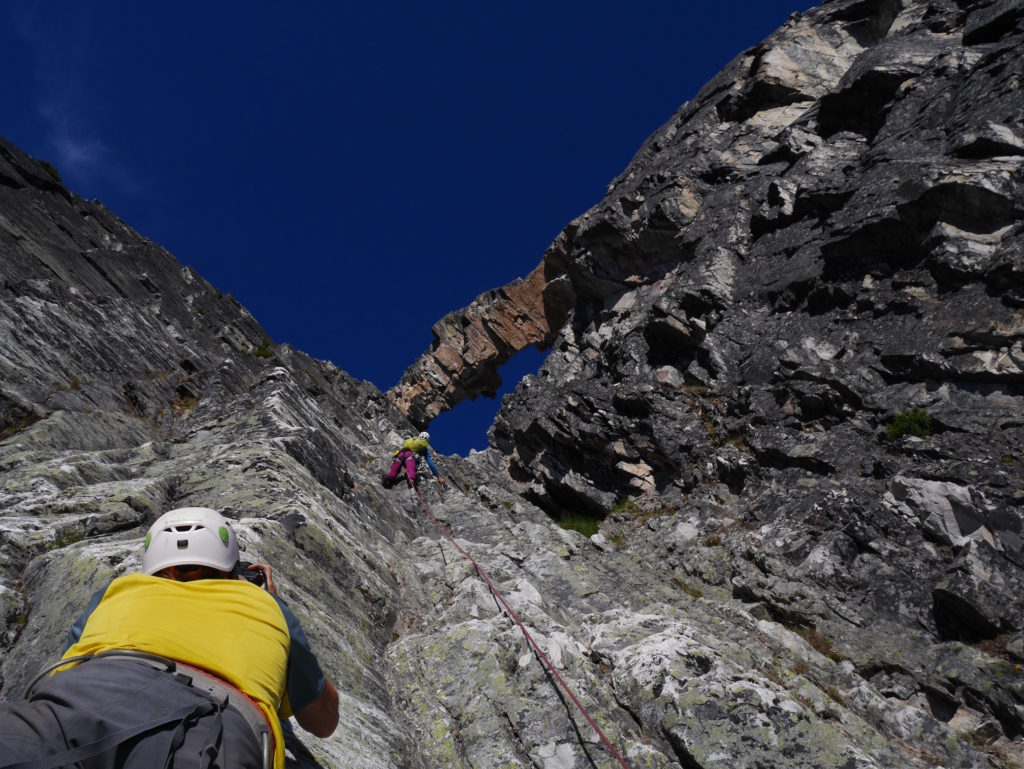
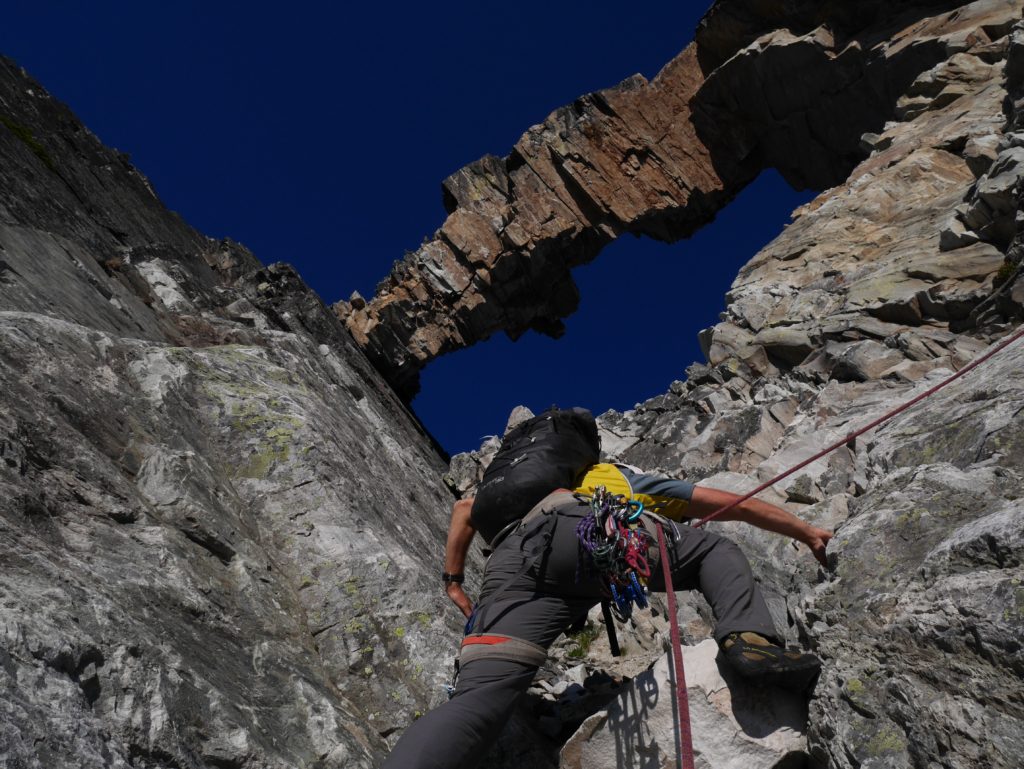
Jasmin Caton prepares gear for the first ascent of the route that leads up and over the arch feature in the background. Vince Hempsall photo.

Last July professional photographer Steve Ogle, ACMG guide and Patagonia athlete Jasmin Caton, and I climbed a new route up a beautiful natural rock arch feature in the middle of the Purcell Wilderness Conservancy.

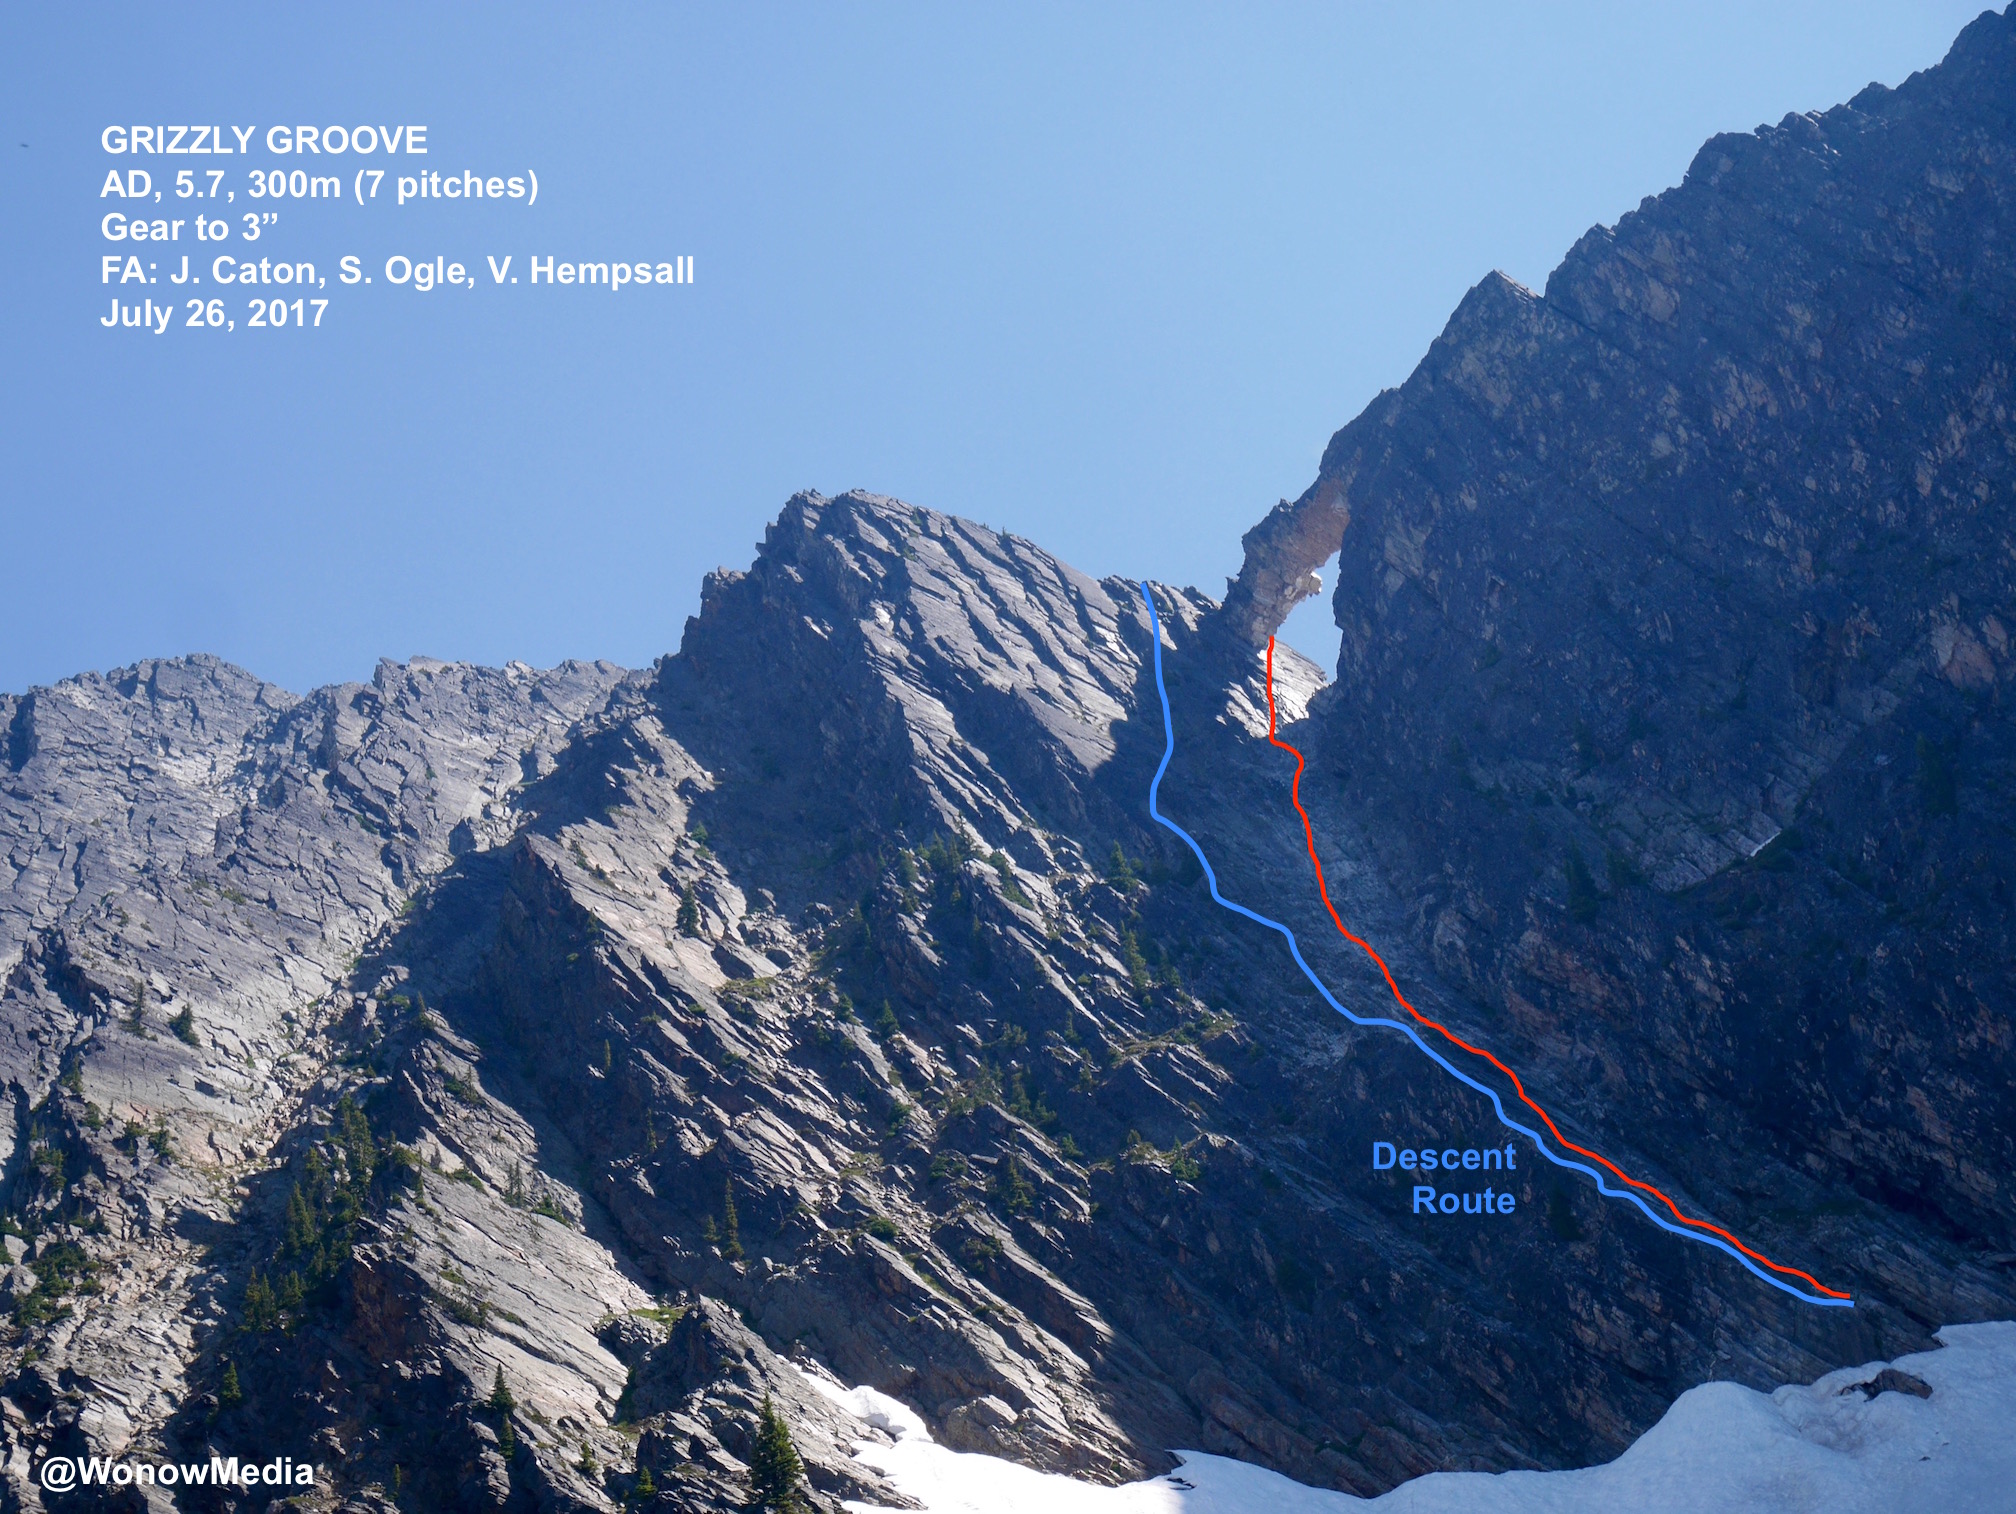
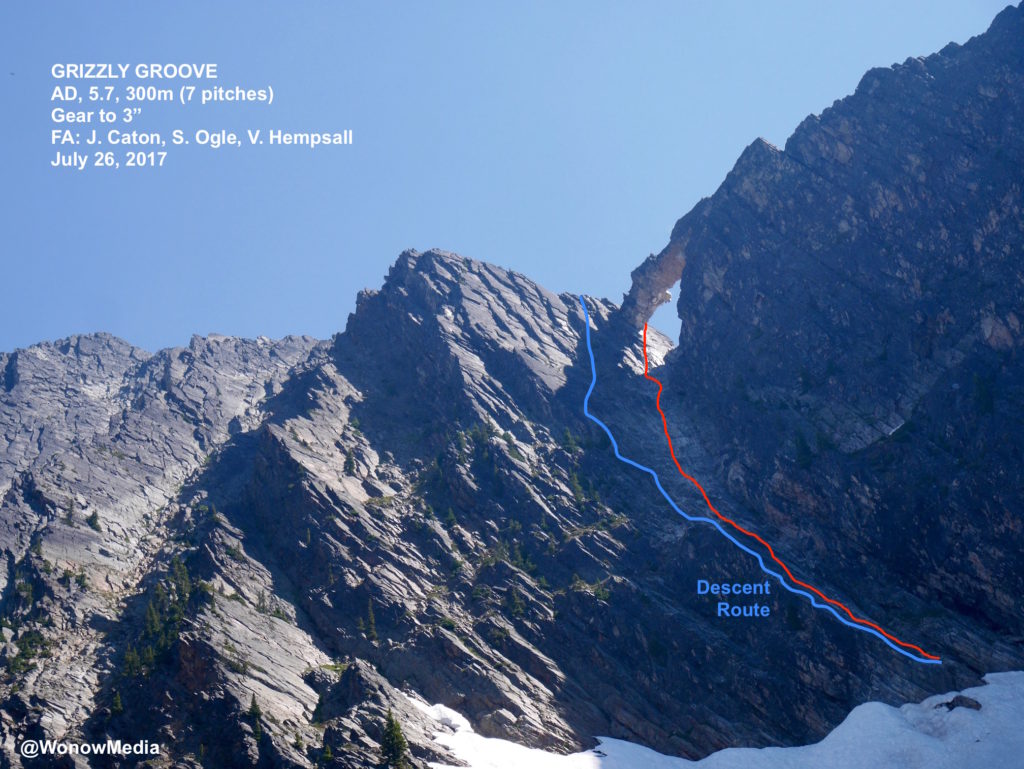
The entire adventure is detailed in my article coming out in the Canadian Alpine Journal this Spring but below you’ll find the description of the new seven-pitch route we put up on the arch called “Grizzly Groove.” The name is to honour the Ktunaxa nation that refers to this Jumbo-Toby Creek watershed area as Qat’muk, a sacred place where the Grizzly Bear Spirit is born, where it celebrates in ceremonial dances, and where it eventually dies. If you’re visiting this incredible piece of rock, please be respectful of the importance of this area, both culturally and environmentally, and leave no trace.

Steve Ogle photographs Jasmin Caton on the 5th pitch of the Grizzly Groove. Vince Hempsall photo.

ACCESS

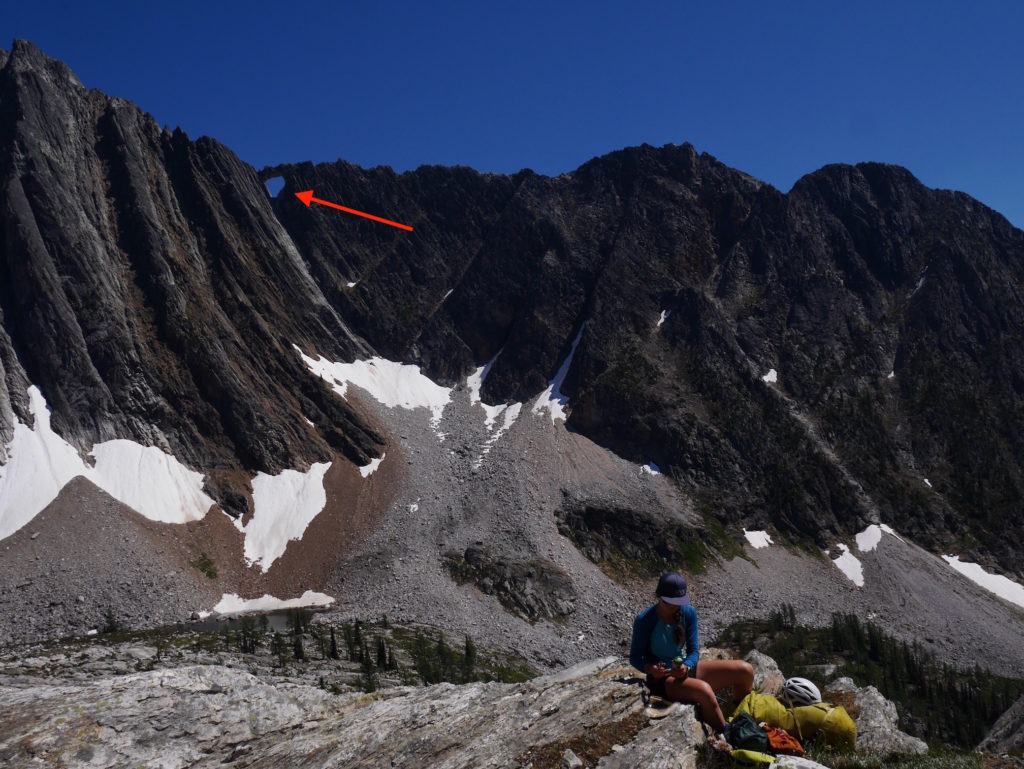
From the parking lot of the popular Monica Meadows camping spot in the West Kootenay, hike the trail for about 45 minutes until it flattens out and you come to a camping area. Head through this and make your way down the hill in a south-east direction over bogs and streams aiming for a talus field. Follow the talus heading north-east. There will be a notch on the north-east side of the talus that looks quite steep, but as you come around the corner there’s a lower-angle couloir that you can go up to access the next drainage. From the top you’ll see the arch and the lake at the base of it and it’s an easy hike through meadows to reach it. All told it was a surprisingly easy three-hour hike. From the lake closest to the arch, hike up the talus and, depending on the time of year, the snow slope, make the awkward move past the bollard and cautiously step through loose gravel and stones to reach the main corner that leads to the arch. The rock in the corner is too chossy to climb but there’s good quality rock on the slab about five metres to climber’s left. Start there.
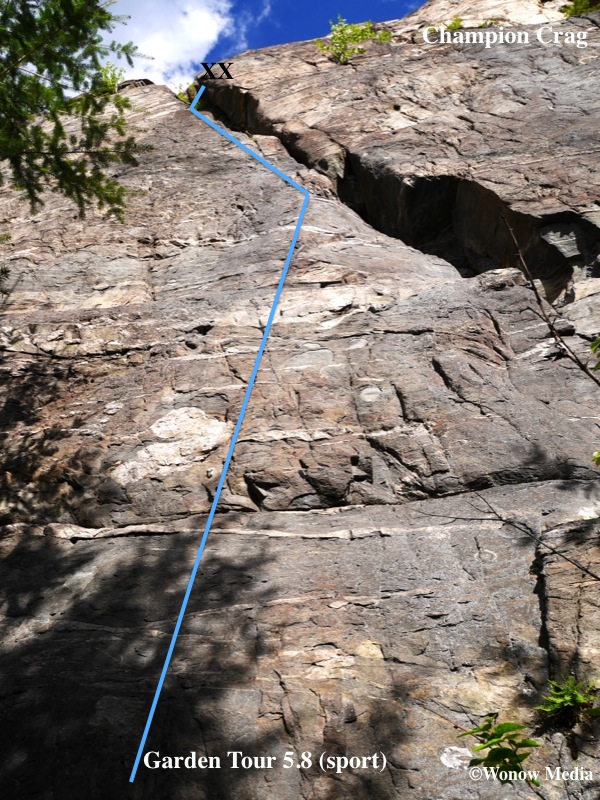
Grizzly Groove topo. Wonow Media copyright. All rights reserved.

SUMMARY

Grizzly Groove, AD, 5.7, 300m (7 pitches), gear to 3”. FA: J. Caton, S. Ogle, V. Hempsall, July 26, 2017

Gear: 1 full set of Black Diamond camalots from 0.2” to 3” plus doubles of a #1 and #2. Gear belays. Two 60-metre ropes and webbing necessary for rappels.

P1. 5.7, 45m: There are many loose rocks at the base of the route as well as spread throughout different sections so tread lightly and be aware of your rope. Start 4 metres to the left of the main corner and climb the low-angle slab to a large ledge.

P2: 5.5, 60m: Continue up the slab, placing small pieces in discontinuous cracks to a small stance.

P3: 5.5, 60m: Same as above.

P4: 5.7, 60m: The wall steepens slightly here. Continue up and then veer right to a stance about 20m under the south side of the arch.

P5: 5.7, 20m: Move up through the large loose blocks to a stance beside a triangle-shaped horn on the north side of the arch.

P6: 5.7, 60m: Step right, then down climb three metres before traversing right and into a dihedral. Place gear then continue up and right to another fist-sized corner crack. Follow this to its termination then step left into easy terrain to the top. The quality of rock on this pitch is spectacular and the jamming is excellent.

P7: If you’re so inclined, climb onto the top of the arch. From a spot about 10m down the east side of the main ridge make an awkward move over a chasm onto the arch proper and climb the easy terrain (5.7) making sure to go over the large boulder feature rather than around it. Descend the way you came to the main ridge.
Steve Ogle leads the 6th pitch of Grizzle Groove. Vince Hempsall photo.

DESCENT

There’s a small tree one metre below the main ridge that’s northwest of the north side of the arch. Using two 60m ropes, lower off that to another larger tree about 38 metres directly below. From there do another ~35m rappel, trending skier’s right, to a slung horn. From that station keep lowering skier’s right for about 55m to a large group of trees. The next rap is a full 60m and deposits you on the large ledge where your first anchor was located. There’s a two-nut anchor there and another 55m rap takes you to near the base of the route. (Be careful of loose rock.) One more 20m rap off an anchor left behind made of two stoppers and a #1 cam leaves you at the top of the snow field. (We rappelled off a snow bollard at the peak of the snow field to avoid hiking down the slippery slope. A 60m rap landed us about 20m above the rock talus.)

Pub Wall Rock Guide Updates

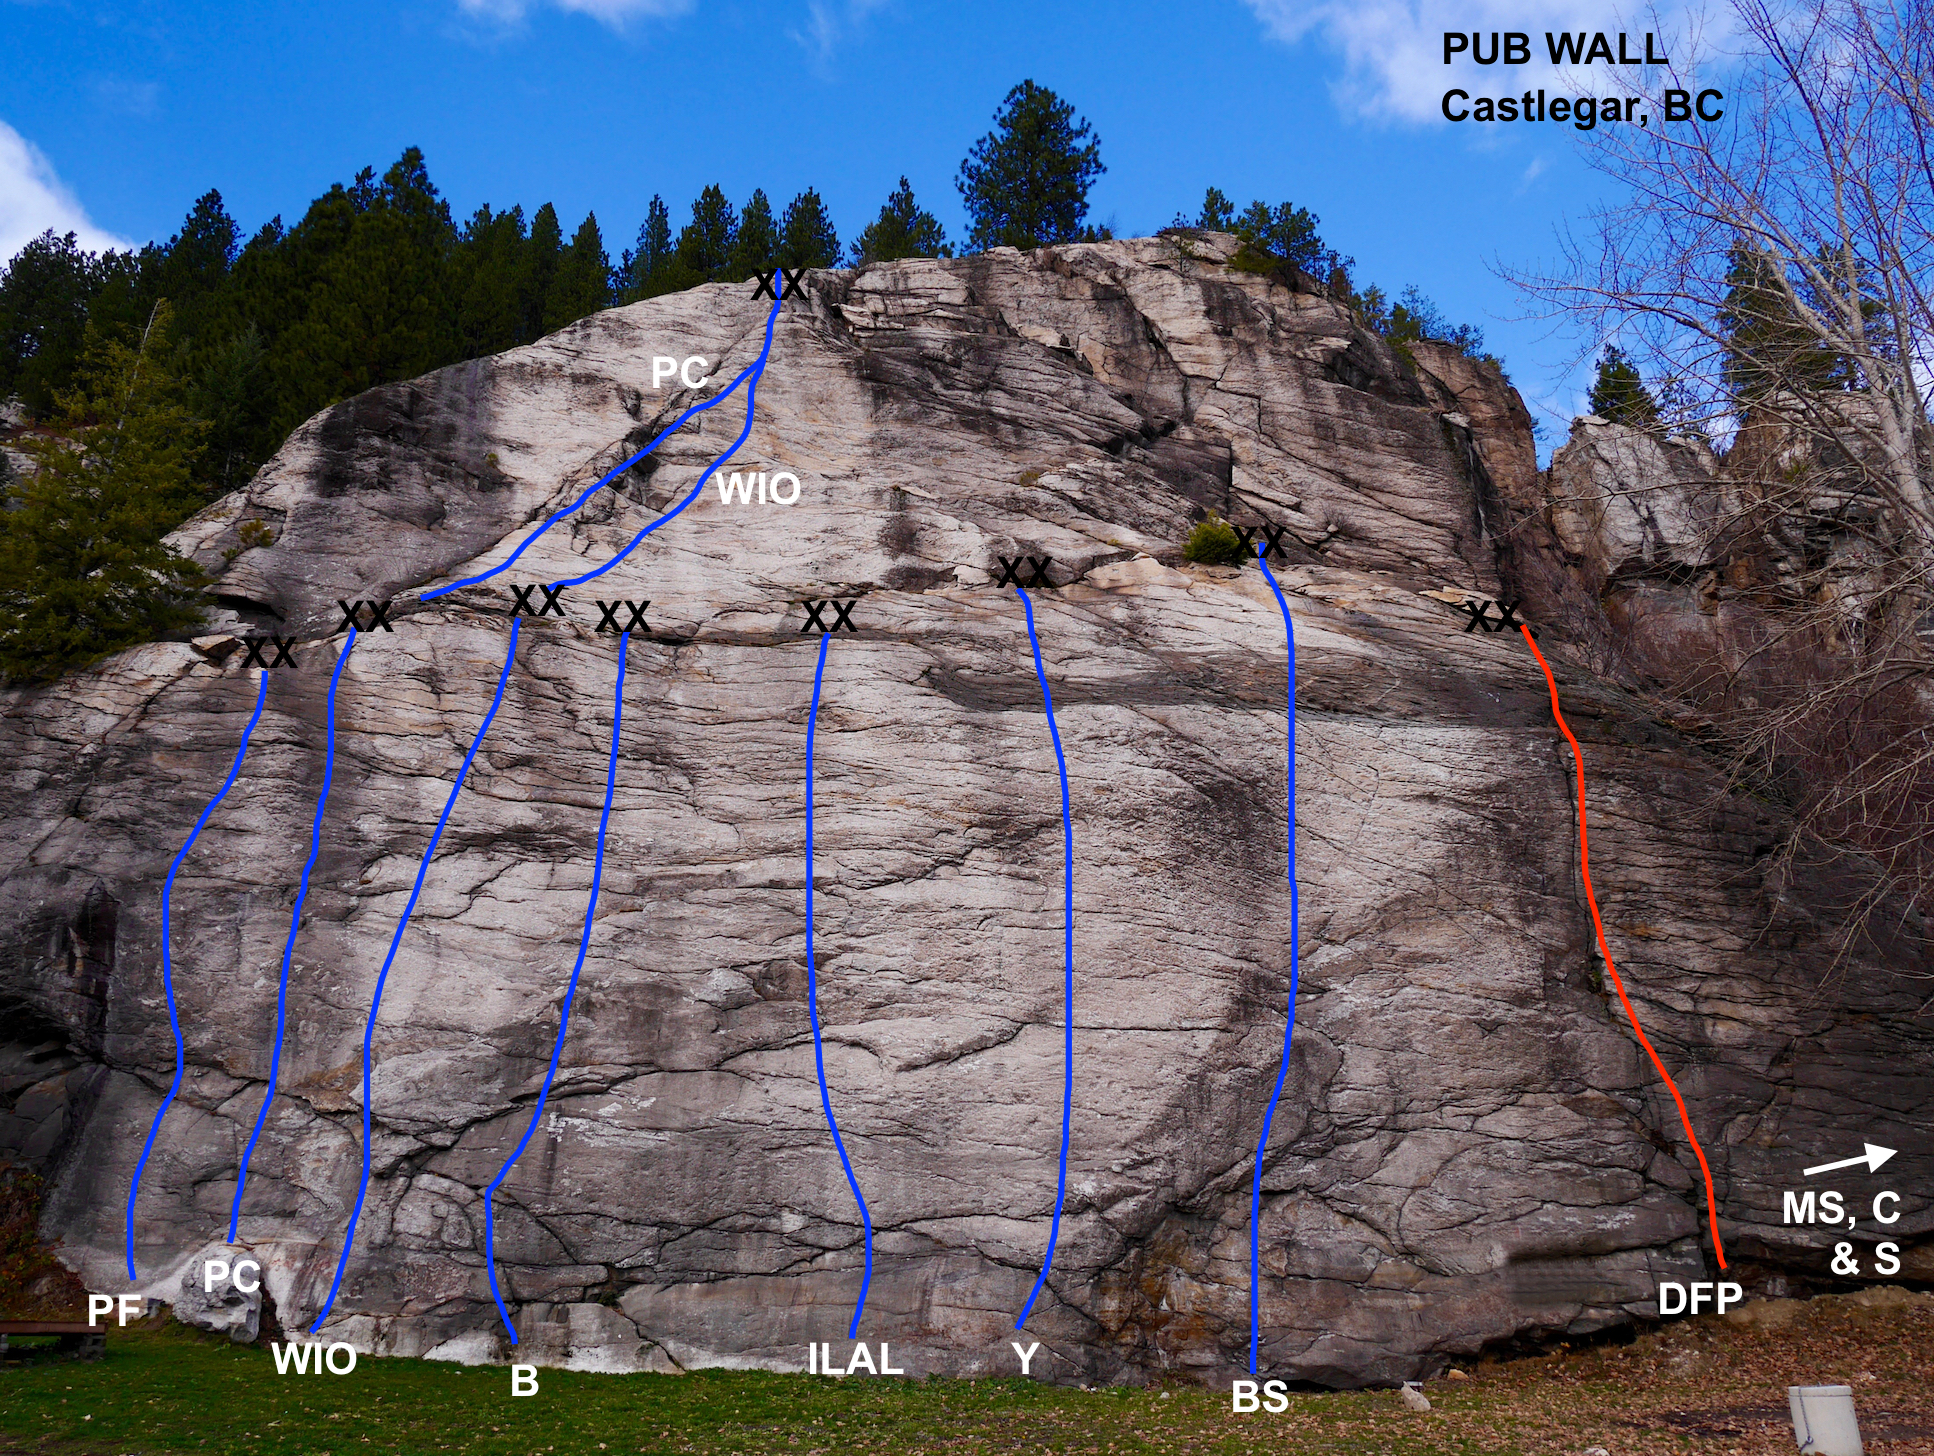
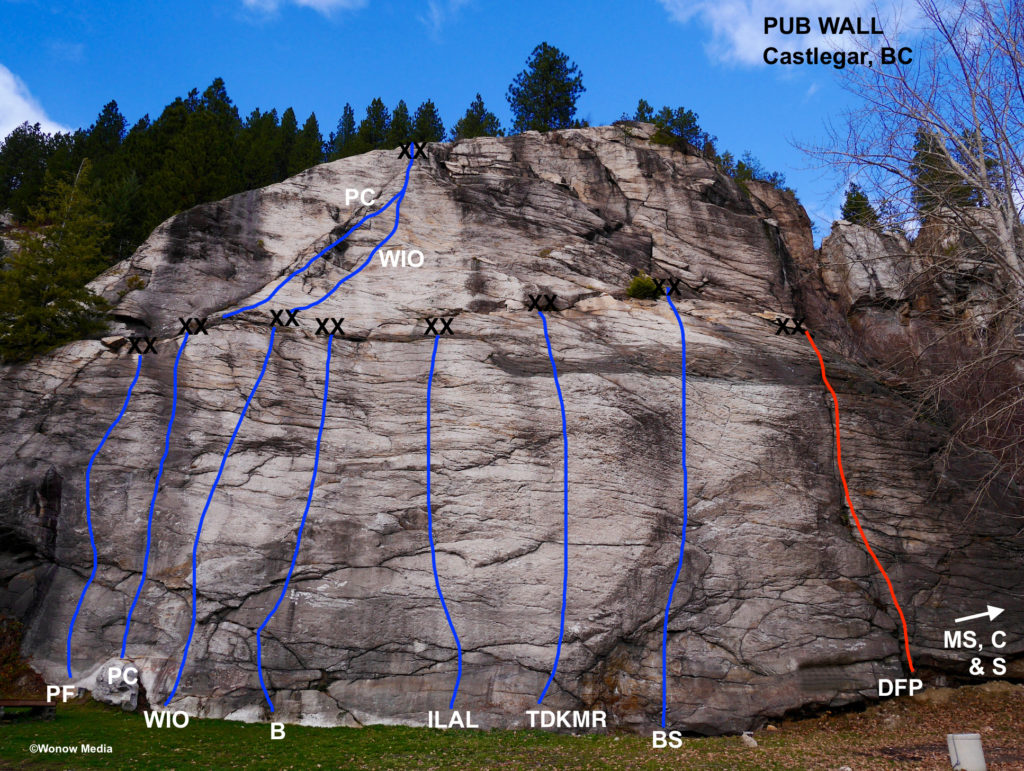
The Lion’s Head Smoke and Brew Pub in Robson, near Castlegar is a special place. Not only does it have an amazing selection of good beer on tap, it’s also Canada’s only rock climbing pub. Forty feet away from the back patio is the Pub Wall natural rock climbing cliff that boasts 11 quality routes. The owners of the Lion’s Head graciously allow us to climb here so we ask that you are respectful: don’t yell, swear or bring other beer onto the property. The bonus of this cliff is it sees early season sunshine. To access it follow the directions on page 19 of the West Kootenay Rock Guide then drive into the back parking lot of the Lion’s Head Pub. You can practically belay from your car here. It should be noted that another site published a topo for this wall but the information shared is inaccurate. There are no access issues for the three climbs around the right corner of the cliff (on the south-facing wall). However, further back and to the right are other cliffs that are on someone else’s property and the land owners there do not want people climbing on them. Here are the Pub Wall routes listed left to right:

Pub Fight 5.10d SPORT
The farthest route on the left. Climb the ramp to the steep face. There’s a definitive crux at the 2nd bolt. (A Kristiansen 11)
Pub Crawl 5.10b SPORT
This climb can be done in one 38m pitch or two pitches. Starts right of a shallow seam on the left side of the wall. P1: Climb off the boulder pedestal onto sustained face climbing with good rests. (5.10b) P2: From the first anchors follow the corner weakness up and right. Watch for a large loose block between the third and fourth bolt. (5.9) (P1: A Kristiansen, B Buten 10. P2: R Logtenberg, S Podstawskyj 11)

Walk it Off 5.9 SPORT
Starts 1.5m right of Pub Crawl. A long, fun route travelling over slabs and ledges. It can be done in 1 or 2 pitches. You can walk off or lower in 2 raps. 14 bolts. 38m. (R Logtenberg, S Podstawskyj 11)

Bender 5.10a SPORT
Start 5m right of Pub Crawl. Follow the crescent of rock up and to the right past 3 bolts. Then go straight and end at the ledge halfway up the wall. (Or continue on the upper half of Walk It Off.) 9 bolts. 20m (R Logtenberg, S Podstawskyj 11)

In Like a Lion 5.10d SPORT
As the name suggests, the route begins like a lion and goes out like a lamb. The crux is at the 3rd bolt – be aware of the ledge below you. 20m. (P Markin, K Robine 11)

Theodore Donald Karabotsos Memorial Route 5.10d SPORT
Named for one of the pub owner’s favourite movies and the “Big Lebowski” painting over the bar. This route tackles one of the steepest sections of the wall. Take small cams for the run-out through the easy terrain if you’re a nervous leader. (N Hadikin, B McIntosh, M Senyk 15)

Bar Star 5.10d SPORT
Start up the steep, right-facing feature and follow the obvious line of weakness over steep rock.
Pumpy below, balancy above, sustained throughout. (A Kristiansen 11)

Deep Fried Pickles 5.9 TRAD
A short finger crack on the right side of the main wall. (JT Croston, A Kristiansen 11)

The next three routes are located around the right-hand corner on the south-facing wall. This area doesn’t get as much sunshine and routes take longer here to dry out.

Maple Stout 5.10b TRAD
The obvious overhanging crack beside the tree. A #5 cam is useful. (B Winter, H Mutch 11)

Cheers 5.8 SPORT
Start at the short corner/break in the main face. P1: Climb the short corner, up easy slabs to a steeper section that ends at a belay ledge. 9 bolts. P2: Traverse right into the crack then up the face/slab to the top. 9 bolts. Descent: 2 raps or use the trail to the right. (B Winter, H Mutch 11)

Salut 5.8 TRAD
From the top of the first pitch of Cheers follow the twin cracks above. (B Winter, H Mutch 11)

This is part of a regular series showcasing the new rock climbing routes in the West Kootenay Region of south-central British Columbia. For more written descriptions of these and other routes, download the West Kootenay Rock Guide updates.

Champion Crag Rock Guide Updates

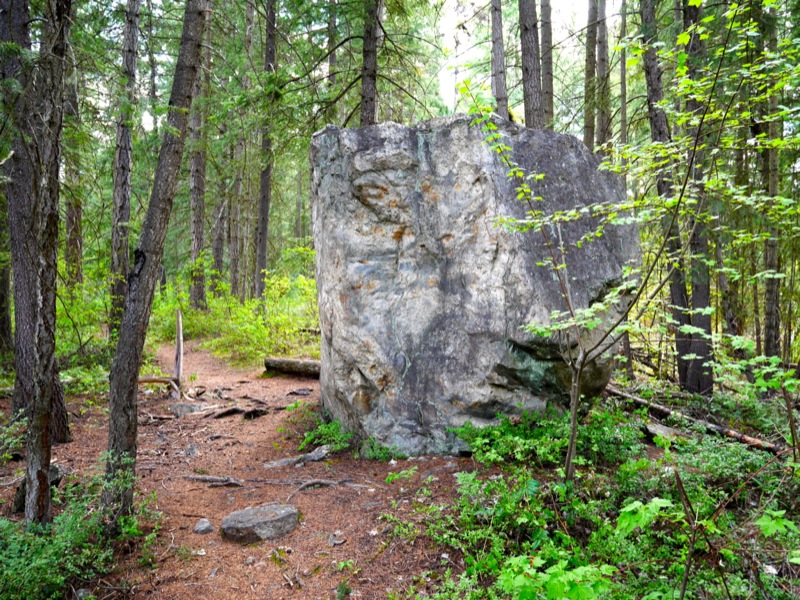
The trail-side boulder that marks where to turn right to access the cliff.

The trail-side boulder that marks where to turn right to access the cliff.

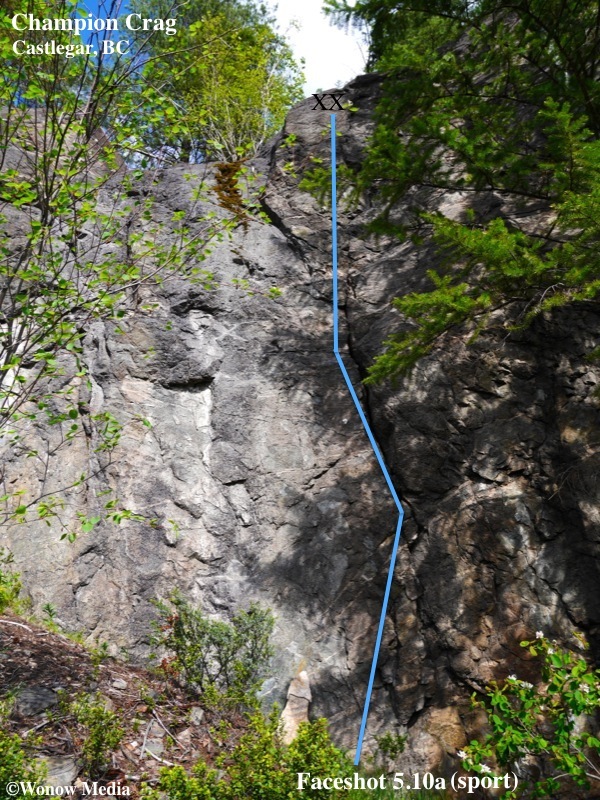
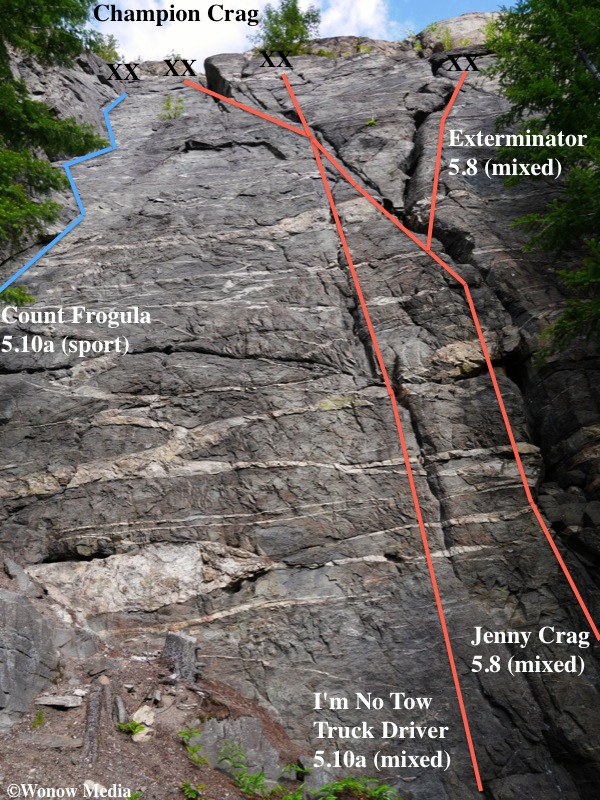
Champion crag is located high on the east rim of the Columbia River valley south of Castlegar. The cliff can be seen from the highway (near Genelle) as a band of dark rock surrounded by lighter coloured rock on all sides. There is also a large, left-leaning crack near the center of the cliff. Access: This crag is one of the longer approaches in the area: it’s a 40-minute walk or 15-minute mountain bike ride along the well-maintained Mel Deanna trail. From Castlegar drive Hwy 3 towards the Bombi summit and Salmo for 5km and then turn right into the viewpoint/rest area. Park here and follow the trail past the viewpoint and through the gate. Walk or mountain bike along the trail making sure to stay right at the first A-frame shelter. Just past interpretive trail marker #6 you’ll come to a large trailside boulder and 40m past that you’ll branch right onto a smaller trail marked with rock cairns. Follow these for 5 mins to the top of the crag where the trail angles back and down to the right and then ends at a 5m drop to a large ledge. There is a rebar ladder here you can use to descend to the ledge where the climbs start.  A 60-metre rope is required. For written descriptions of these and other routes, download the West Kootenay Rock Guide updates.

This is the first climb you reach after descending the rebar ladder.

This is the first climb you reach after descending the rebar ladder.

Champion Crag Rock Guide Updates: This is the 11th in a regular series showcasing the new rock climbing routes in the West Kootenay Region of south-central British Columbia. For written descriptions of these and other routes, download the West Kootenay Rock Guide updates.

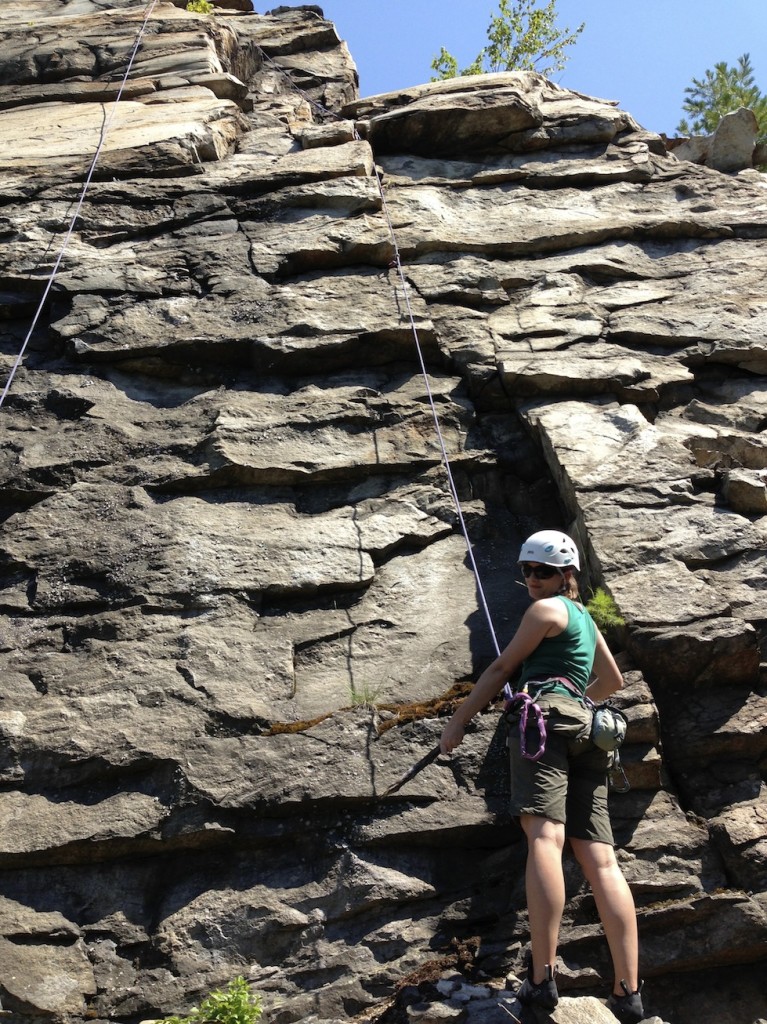
Marley Bassett prepares to clean Son of a Birch.

Polished Wall Rock Guide Updates

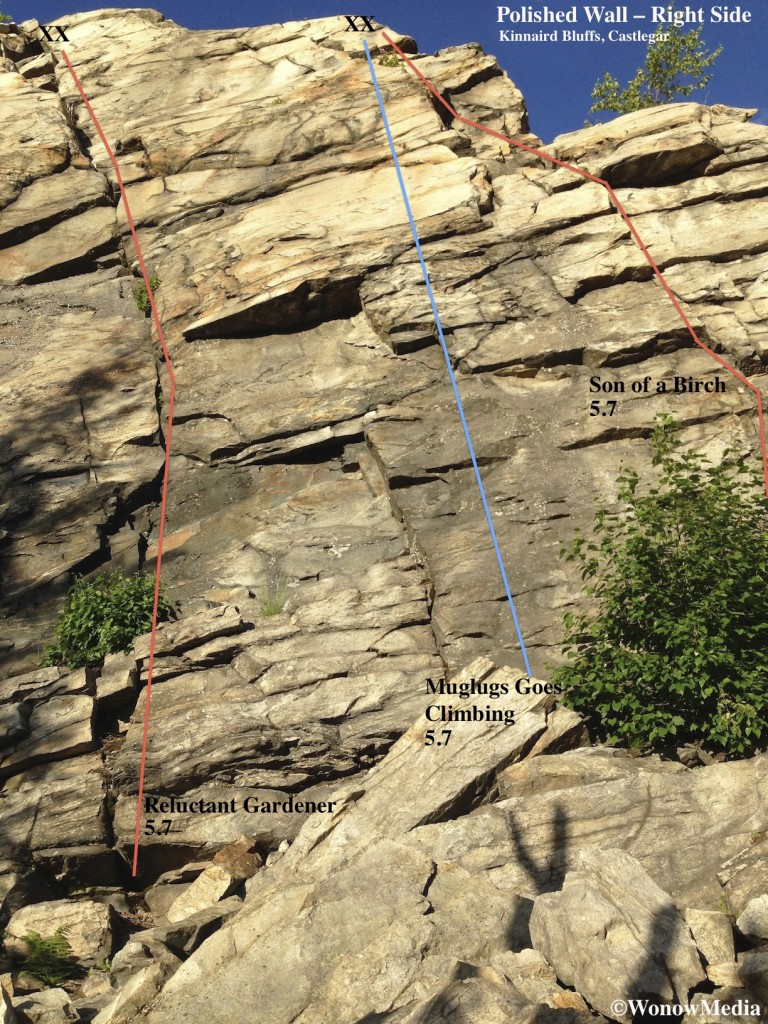
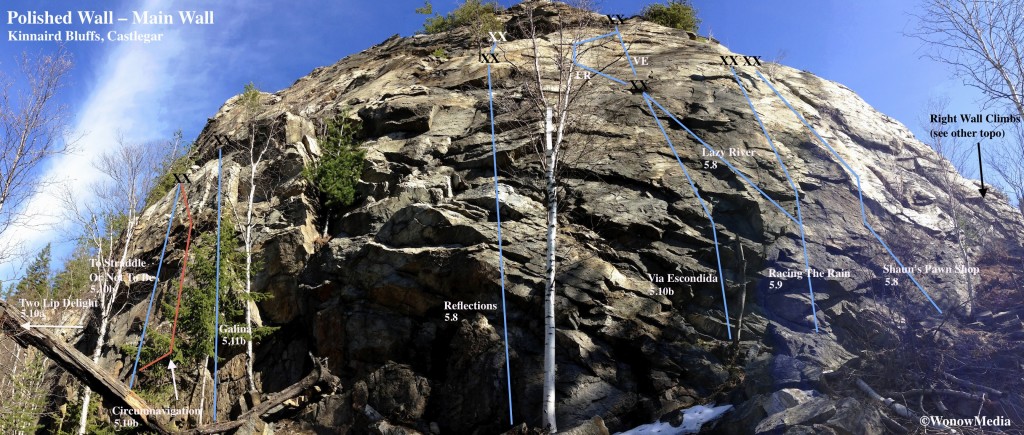
Polished Wall is located at Kinnaird Bluffs in Castlegar, British Columbia. Follow the trail up and to the left (North) from Open Book Wall (page 29 of the West Kootenay Rock Guide). It’s an excellent wall for beginner sport and trad climbers although it’s important to note that the anchors are not easily accessible from above.

In order to fit most of the routes on the main wall into one topo image, a fish-eye lens was used so you’ll notice some of the distances appear skewed. The two-pitch routes Reflections, Via Escondida and Lazy River all require two rappels as they top out around the 37m mark.

For route and access descriptions please download the West Kootenay Rock Guide updates.

Marley Bassett prepares to clean Son of a Birch.

Marley Bassett prepares to toprope Son of a Birch.

RFW Wall Rock Guide Updates

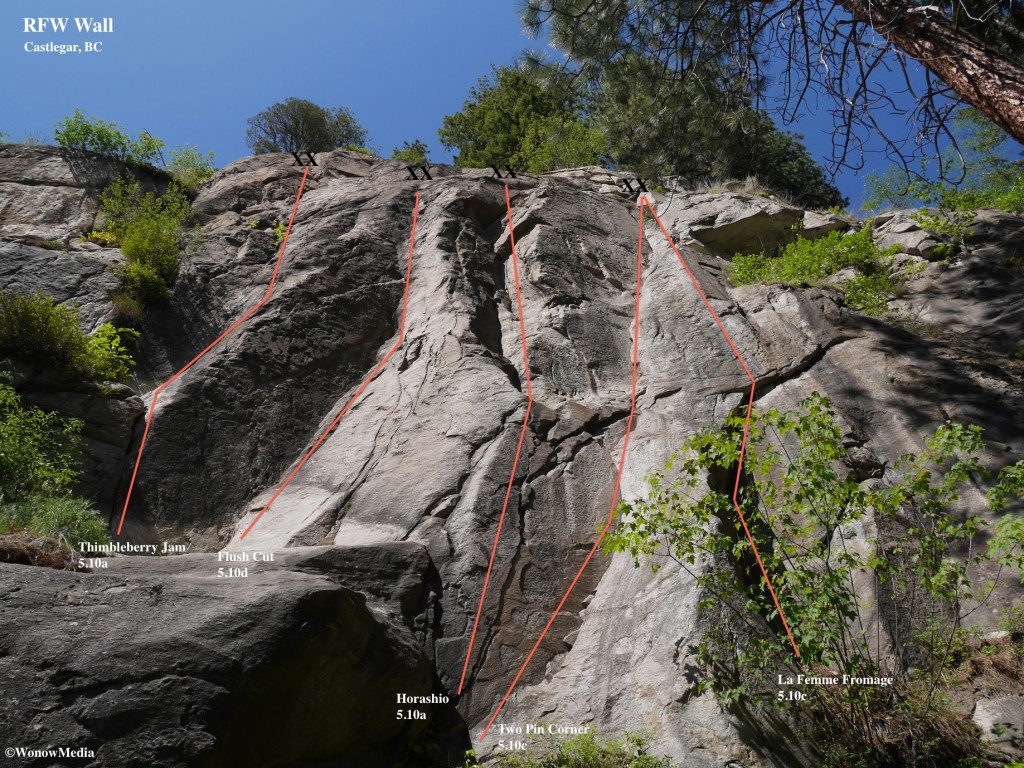
RFW Wall is located just past Scottie’s Marina on Broadwater Road. It features five of the best moderate trad/mixed routes in the area. However, please note there is poison ivy in this area. Steps have been taken to eradicate it but it’s wise to be wary of any plant with “leaves of three.”

For route and access descriptions please see page 21 of the West Kootenay Rock Guide. For a written description of La Femme Fromage, download the West Kootenay Rock Guide updates.

RFW Wall Rock Guide Updates: This is the 12th in a regular series showcasing the new rock climbing routes in the West Kootenay Region of south-central British Columbia. For written descriptions of these and other routes, download the West Kootenay Rock Guide updates.

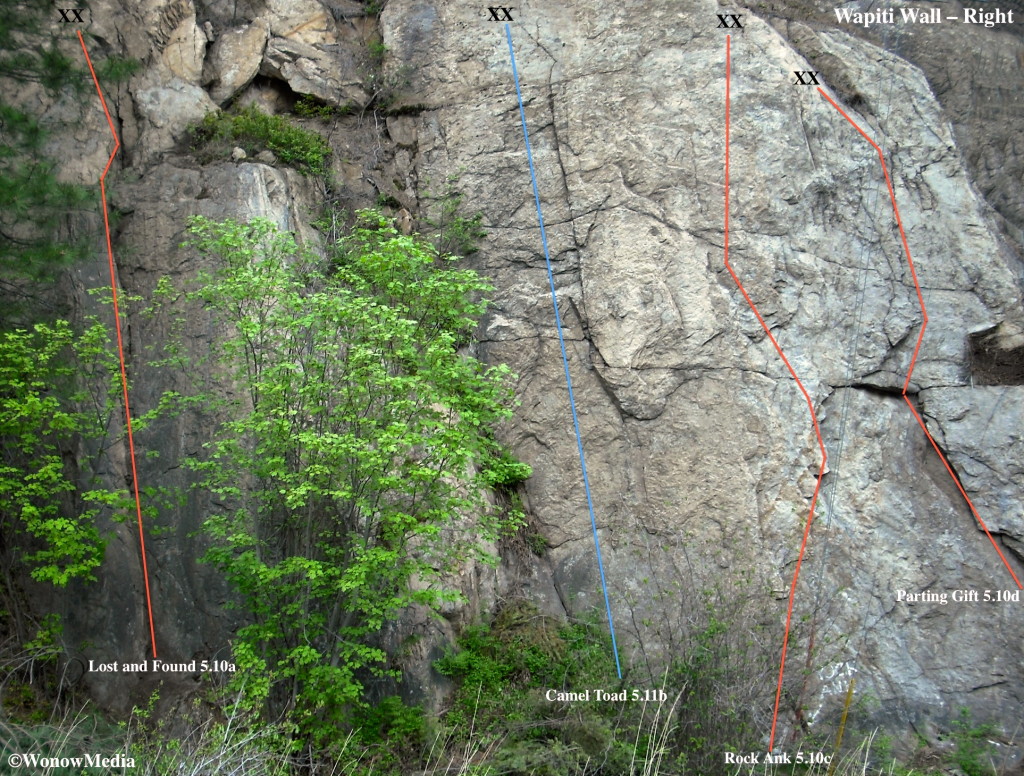
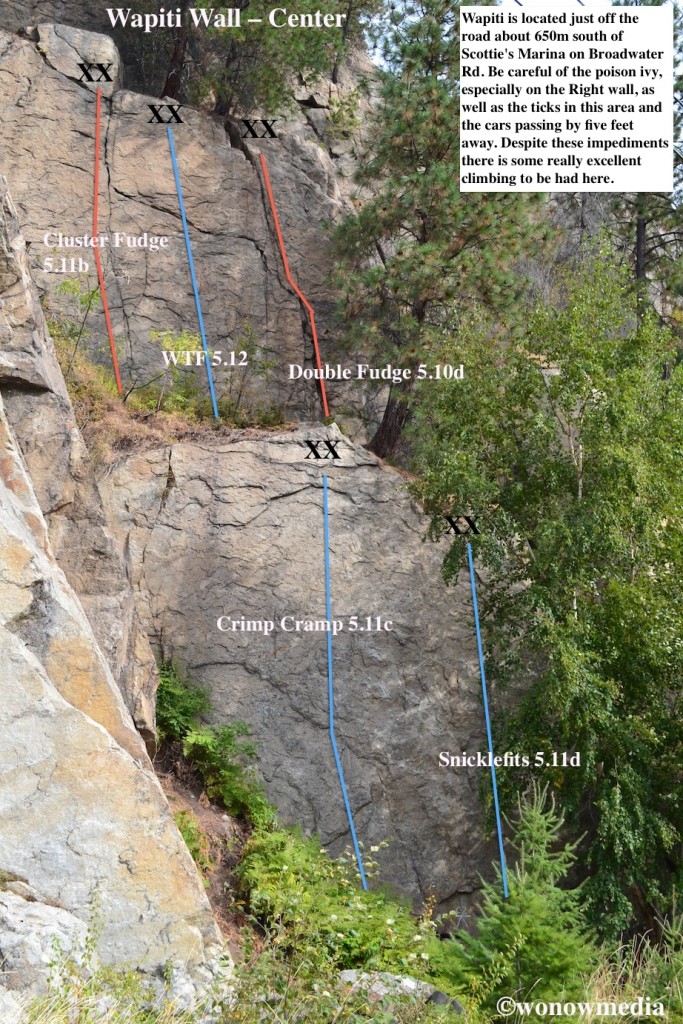
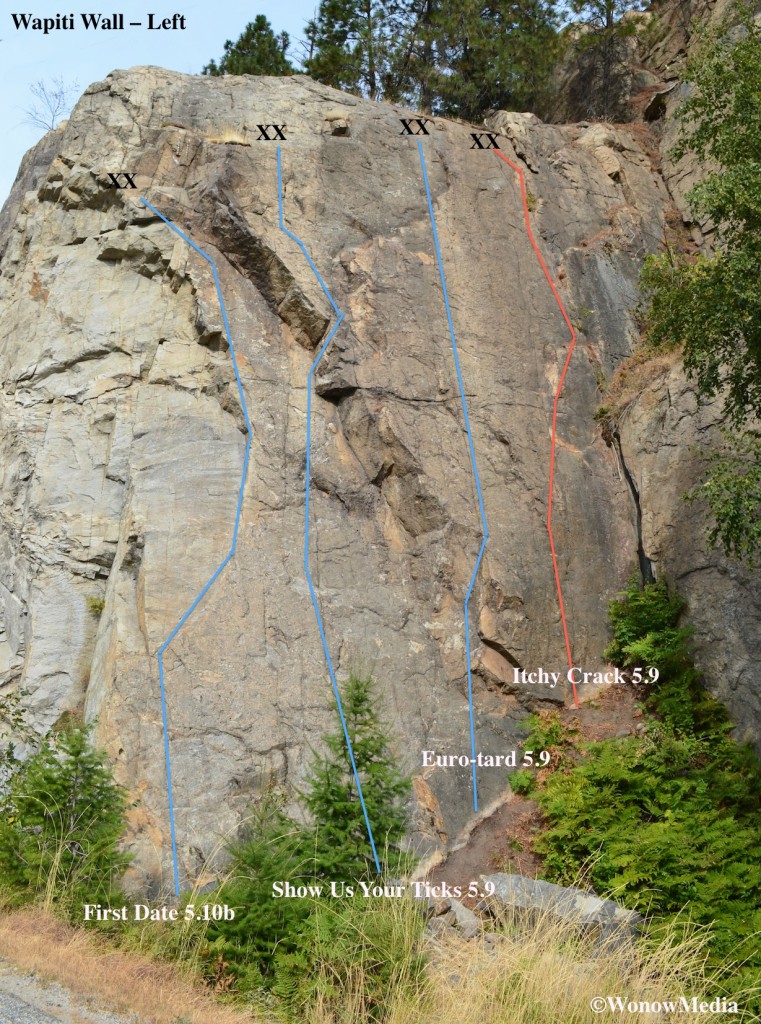
Wapiti Wall Rock Guide Updates

For further descriptions about climbs in the Arrow Lakes area near the community of Castlegar in south-central British Columbia, Canada, refer to page 19 of the West Kootenay Rock Guide. Access: This wall has, arguably, the easiest access in the Kootenays. (The name comes from the Cree word for “elk.”) It is located 650m south of Scottie’s Marina. You can’t miss it as you drive towards Scottie’s because the wall is so close to the road it’s practically on it. For parking, the best option is to do a U-Turn at Scottie’s, drive back to the wall and use the narrow pullout on the lake side of the road. There are three separate walls here with 14 climbs on them. Please note, Parting Gift has been overrun with poison ivy lately. Directors of TAWKROC will be dealing with it soon but in the meantime, please avoid any plants with “leaves of three.”

The Wapiti Wall Rock Guide Updates: This is the tenth in a regular series showcasing the new rock climbing routes in the West Kootenay Region of south-central British Columbia. For written descriptions of these and other routes, download the West Kootenay Rock Guide updates.